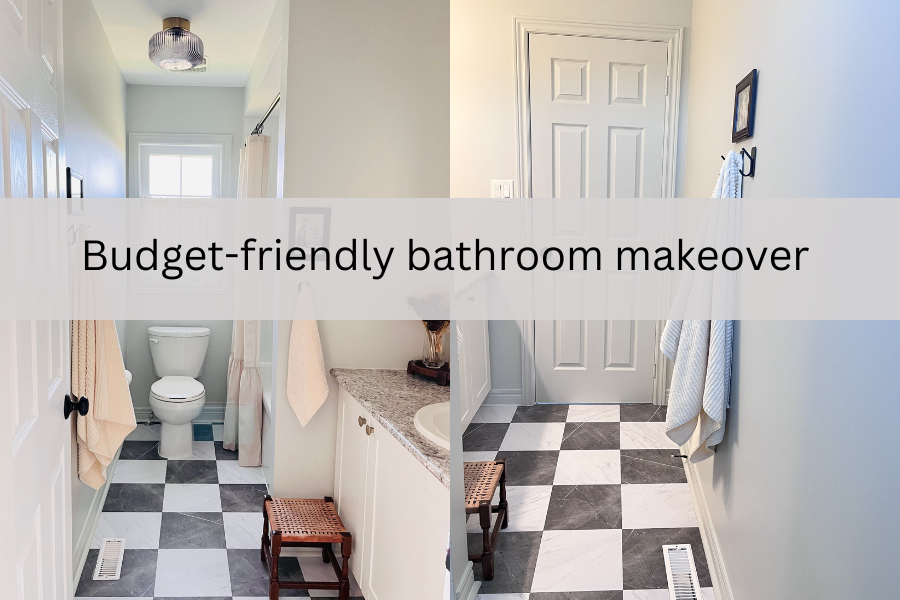
Need a budget friendly bathroom make over idea? read all about how I turned a builder basic bathroom into a stylish space with a small budget for a little less than $350
Have a bathroom that needs some love? Need some affordable ideas to to make over your bathroom but your renting or don't have a large budget, well let me help you out. I recently decided that my small main bath was not worthy to put on the market and it needed some serious help. With my big ideas and small budget I knew I was going to have to get creative.
After many hours of annualizing the boring bathroom, I quickly realized that just paint wasn't going to improve this washroom or make it shine.
I thought what if we change the vanity but with my small budget and so many vanities not in stock I had to think of something else.
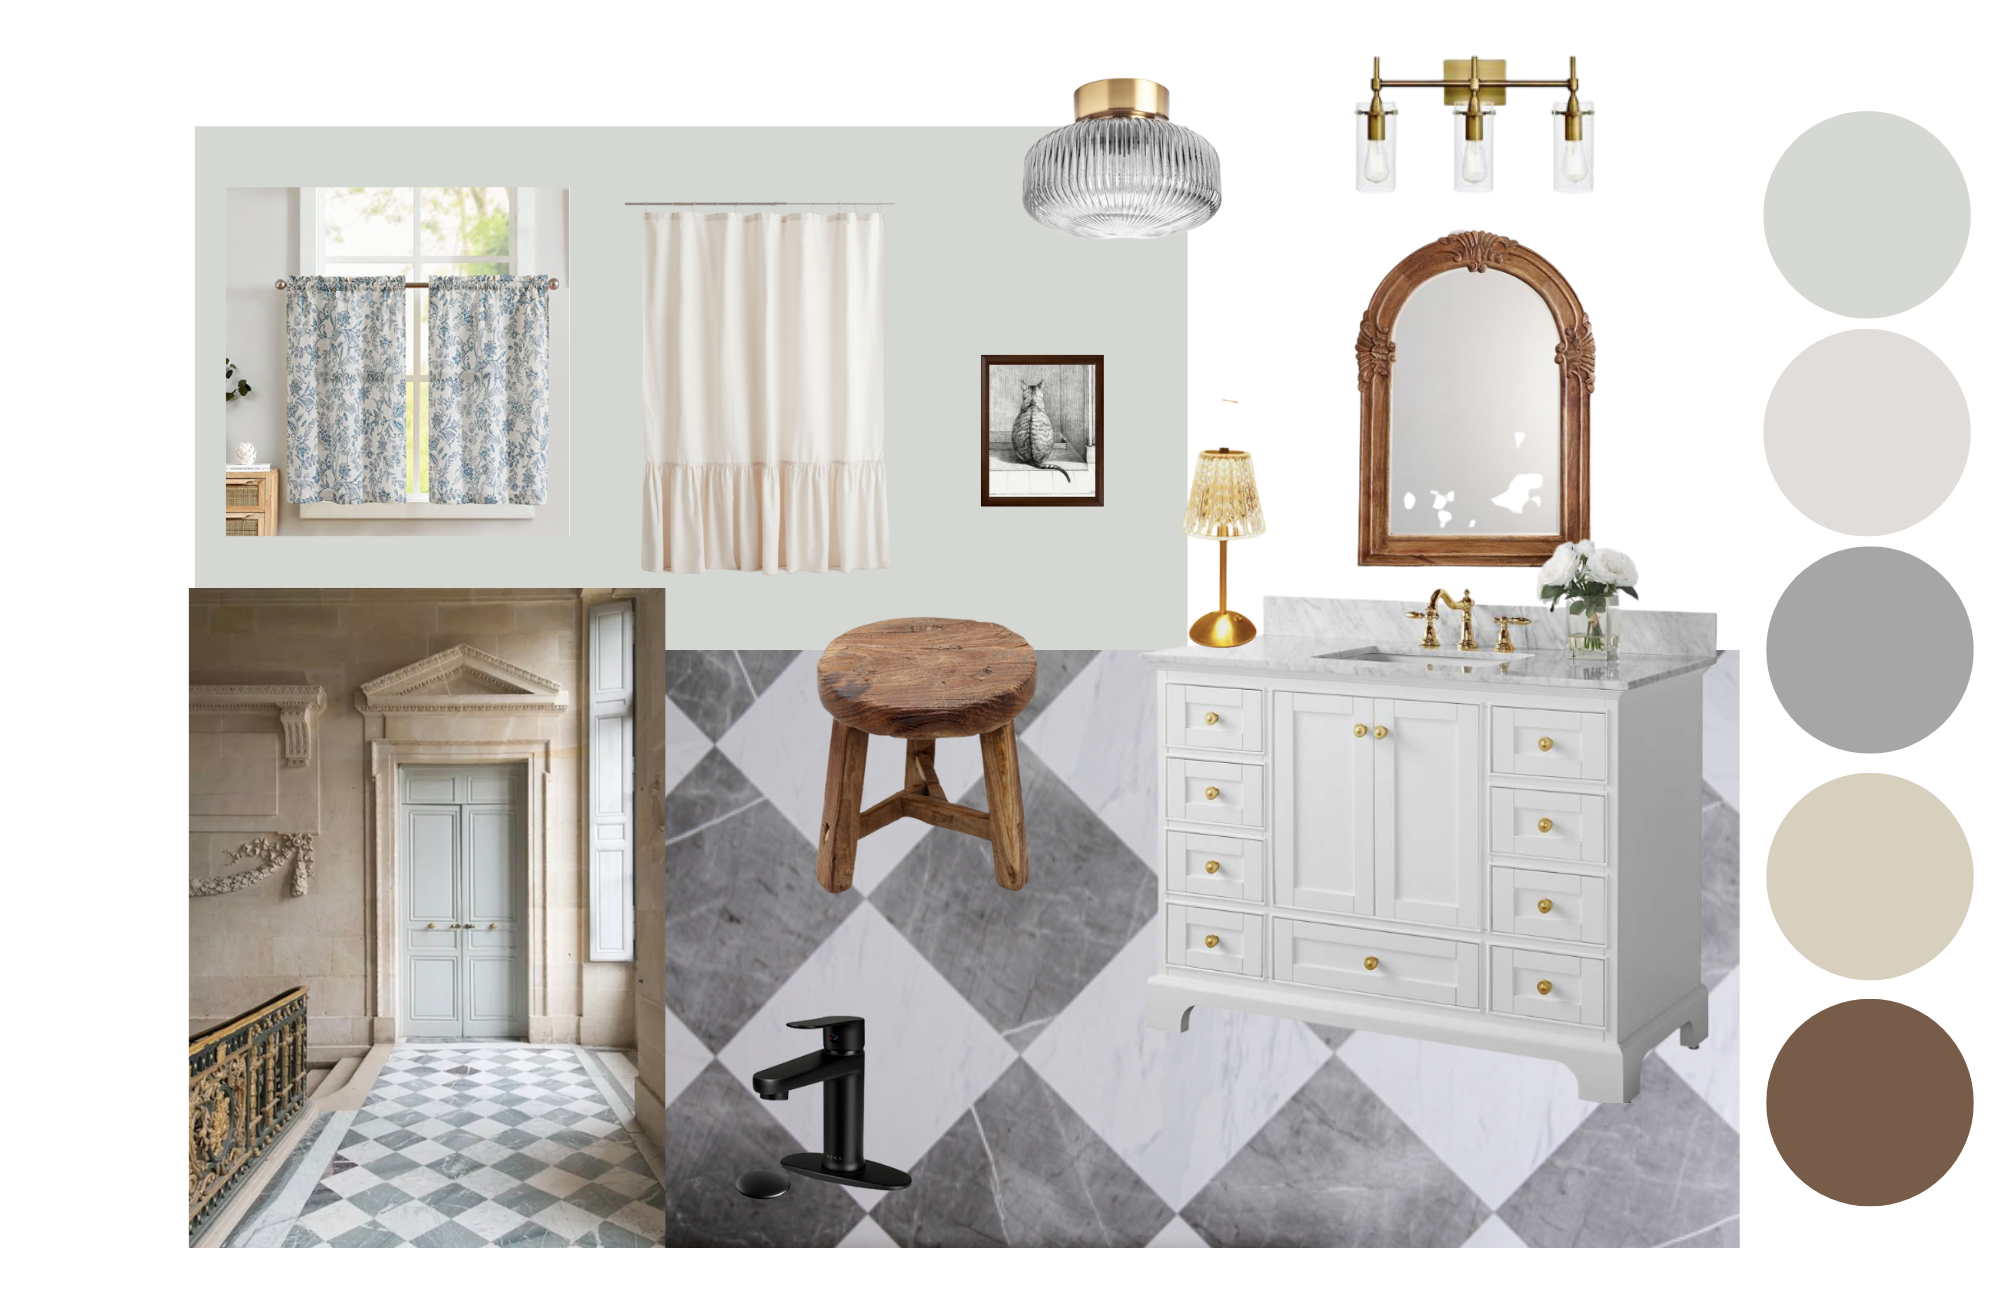
Then I headed over to Pinterest to get some ideas. I came across some kitchen and hotel designs inspired by the south of France. I was loving the checkered flooring and the soft grey paint colours.
however, I wasn't feeling the high contrast of black and white flooring but I was really loving how the harlequin flooring looked and wondered if I could make this happen with my small budget.
While scrolling this image appeared, a European hotel had this beautiful soft grey blue door with creamy beige tiles and with softer grey and white checkered flooring , and it was like a lightbulb went off In my head and I know exactly what I wanted to do.
Now comes the tricky part how do I do this with my budget friendly budget of $300. I certainly couldn't do flooring for that, or could I? I remember that Chris loves julia had a peel and stick flooring with floor pops.
It was currently sold out but I had time to wait so I figured I can tackle the rest of the bathroom and if the floors are not available in time I could go with another option from their site.
As my luck had it a week later they came back in stock and my dreams of a budget friendly French hotel inspired bathroom make over was set in motion. I created a mood board and picked a paint colour.
If you want a mini how to on how I did the floors you can check out my Instagram highlights marked bathroom @tvd.Interiors
Below is my mood board for my budget friendly bathroom make over.
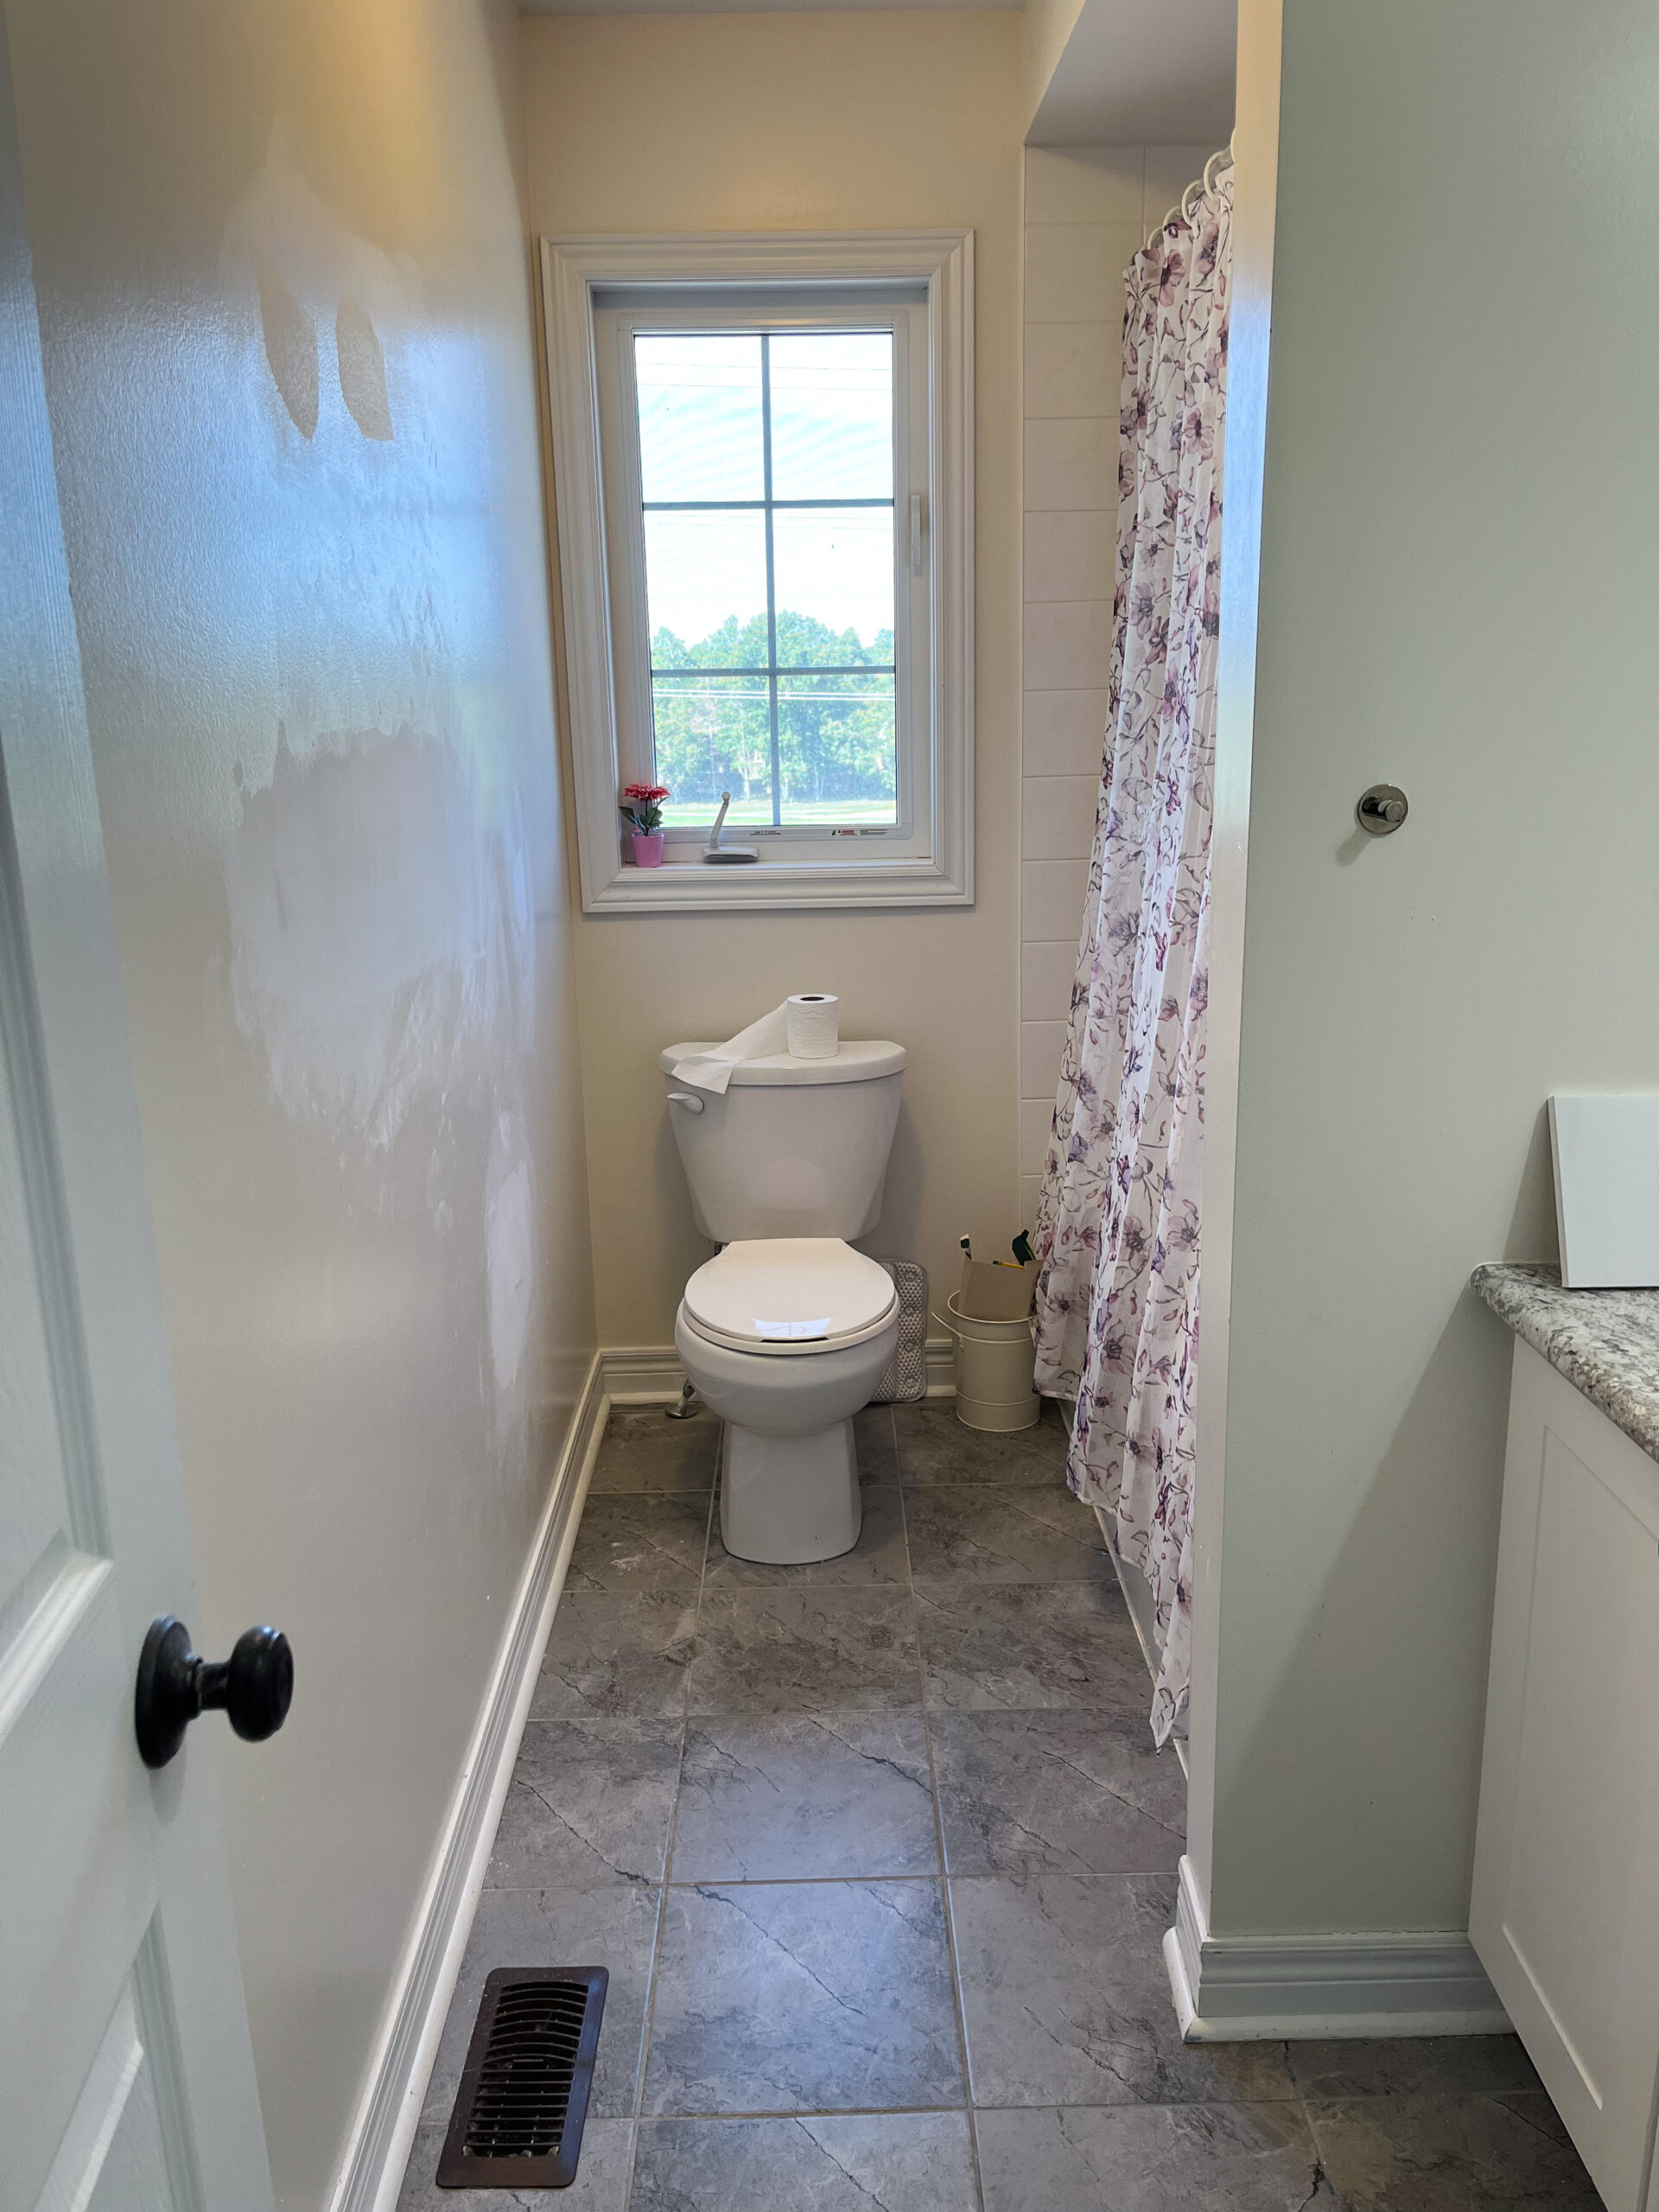
Let me show you where I started with this bathroom makeover. It wasn't too bad, just builder basic and boring.
The flooring has always bothered me it wasn't install properly and the patten with the counter top was just to busy for me.
It didn't need a full Reno just need a nice refresh to brighten the space and make it tie into the rest of the house.
First things first we fixed all the walls then I painted with Benjamin Moore alaskan husky in an egg shell finish. I decided to paint the trim around the windows, baseboards and back of the door all the same colour. It's personal preference but honestly I love how it looks so seamless and clean.
The flooring was pretty easy its just peel n stick tiles the only problem I had was the cuts around the toilet and I would recommend taking the shoe molding off it just made it easier.
I did spray some of the tiles near the bath tube with spray adhesive I used gorilla glue. I watch a YouTube video the lady suggested doing this because sometime the corner can pop up.
My experience they all seem to adhere rather well. I just did this extra step to make sure they stayed put. you can watch her video Here
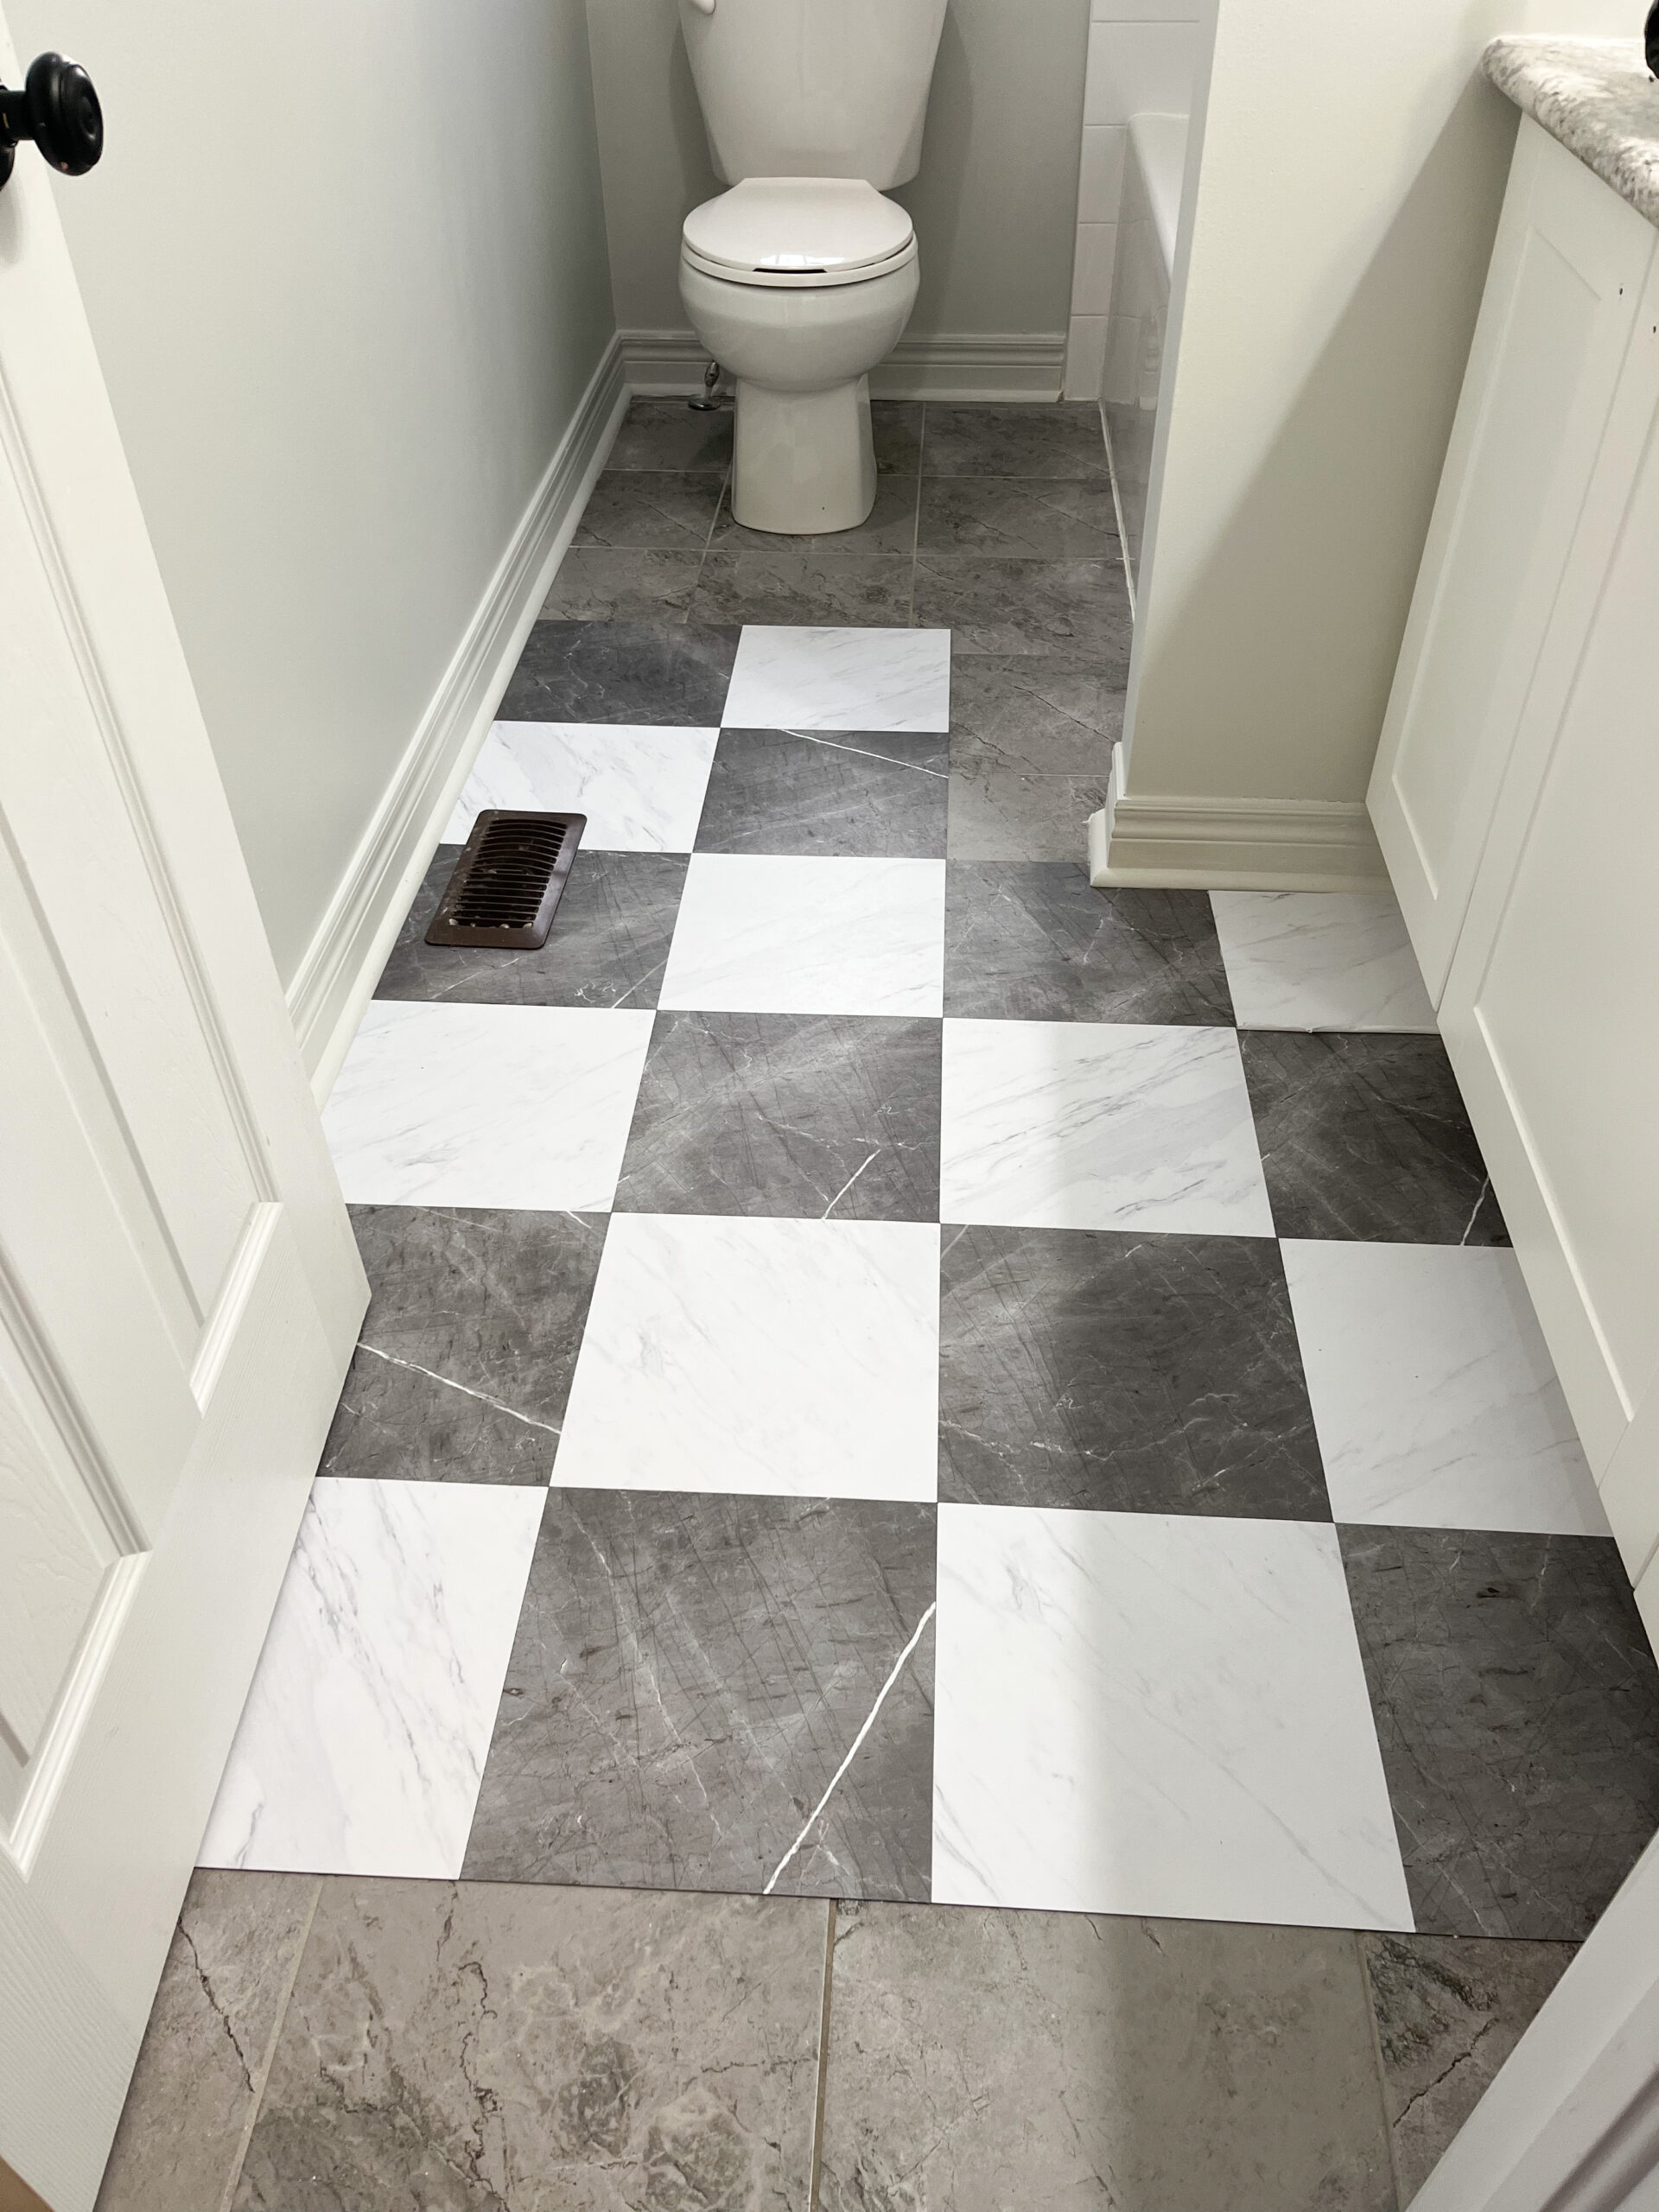
For an all over review of the Chris Loves Julia floor pop tiles I would give a 9 out of 10. They lose a point because I find some of the corners don't match up perfectly however, I don't think its a big deal and I can see these lasting awhile. They are so much better than the busy tiles I had before.
Purchased 4 boxes total came to just under $103 with tax. I calculated I needed about 36 tiles however I bought the extra box to allow for mistakes cause I'm not really a DIYer lol, in total I had 48 tiles to work with.
These are also a great budget-friendly option for renters as well, but if your renting I would skip the glue just to make sure you can get them up when you move.
Before
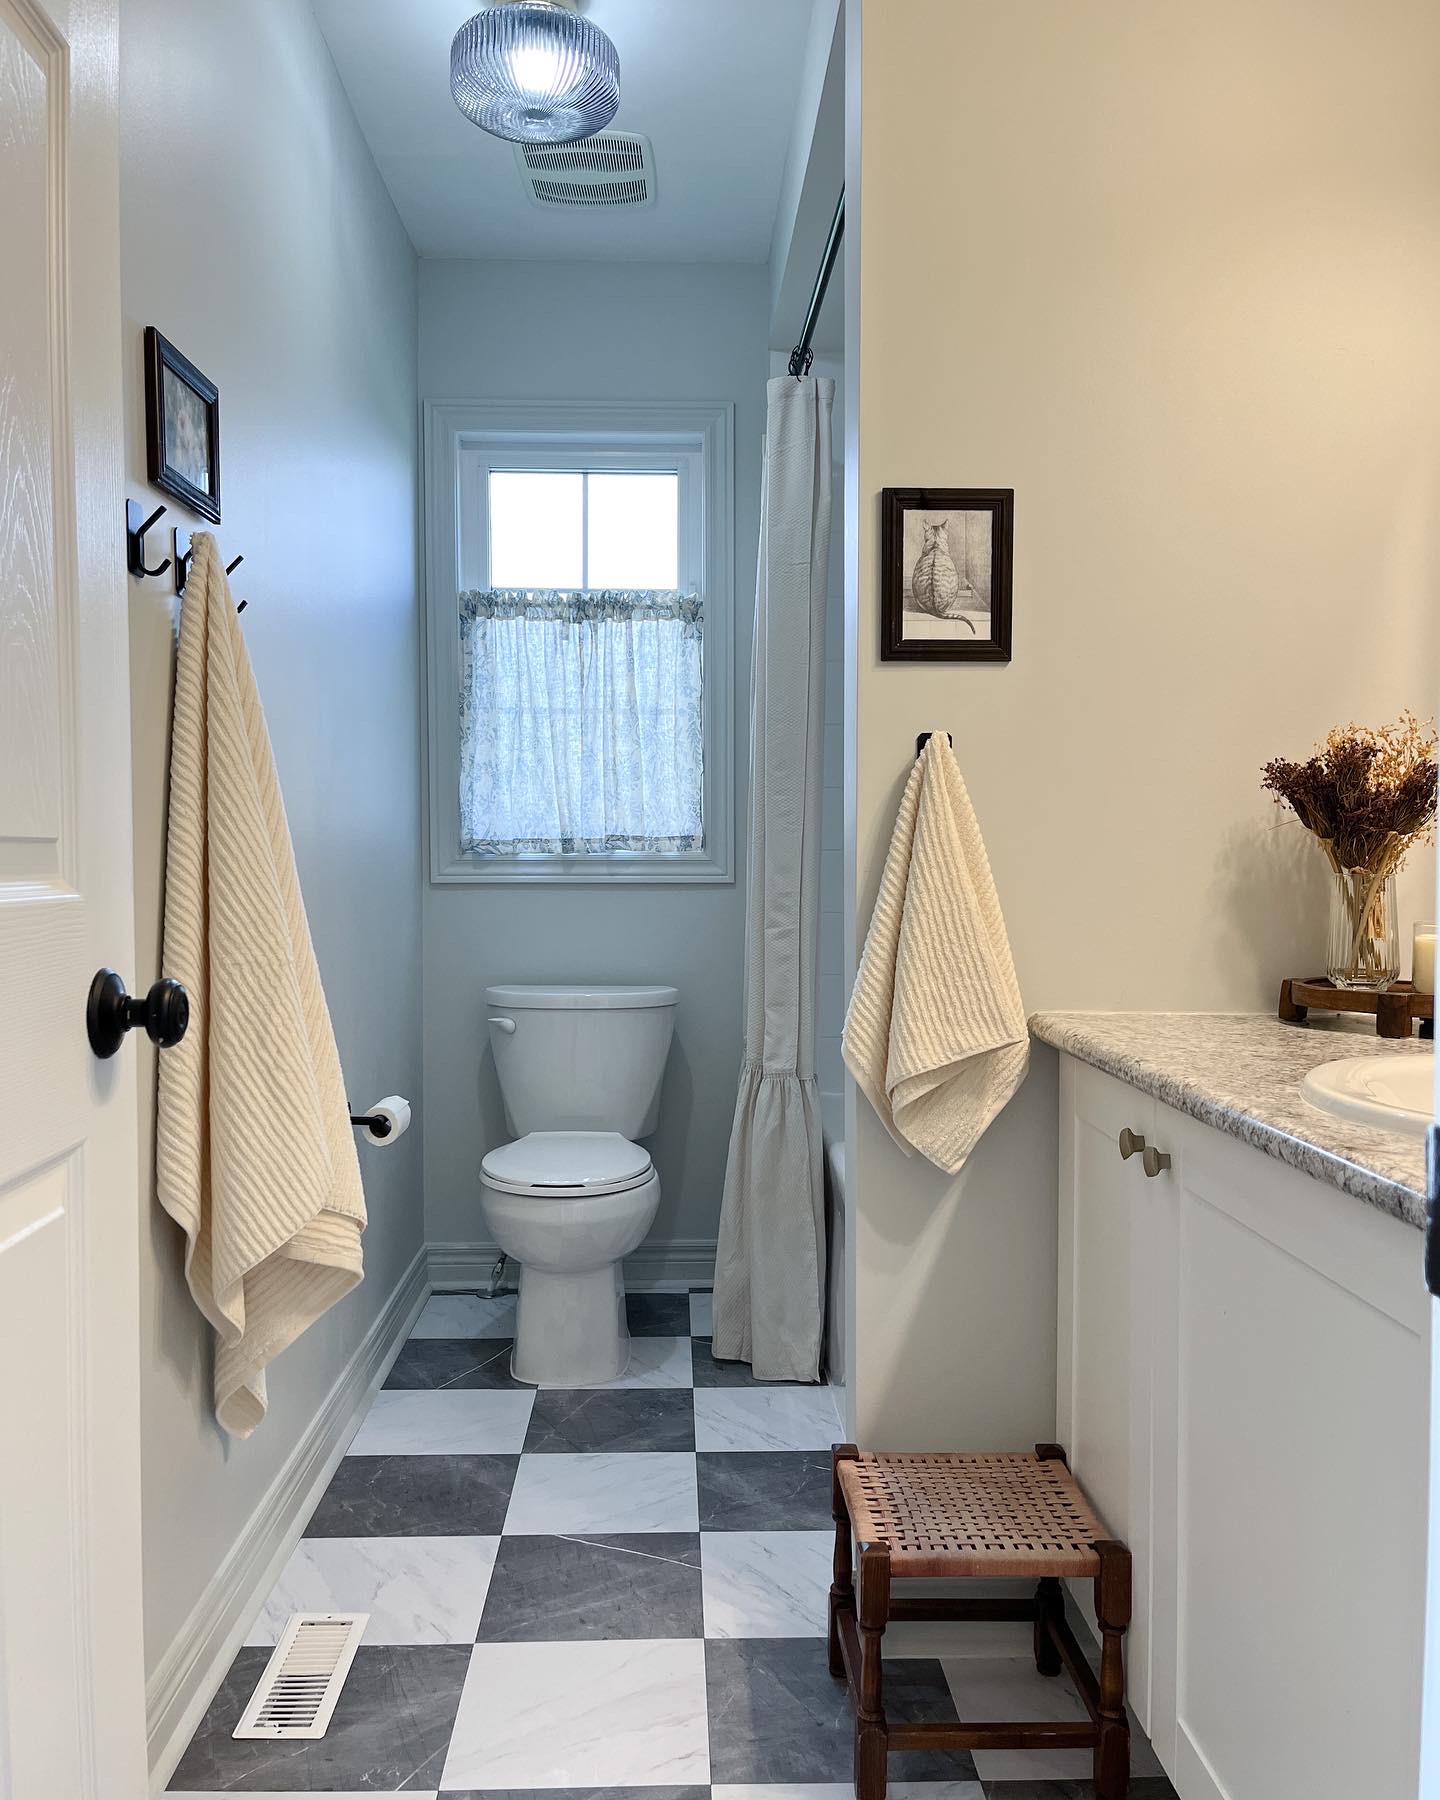
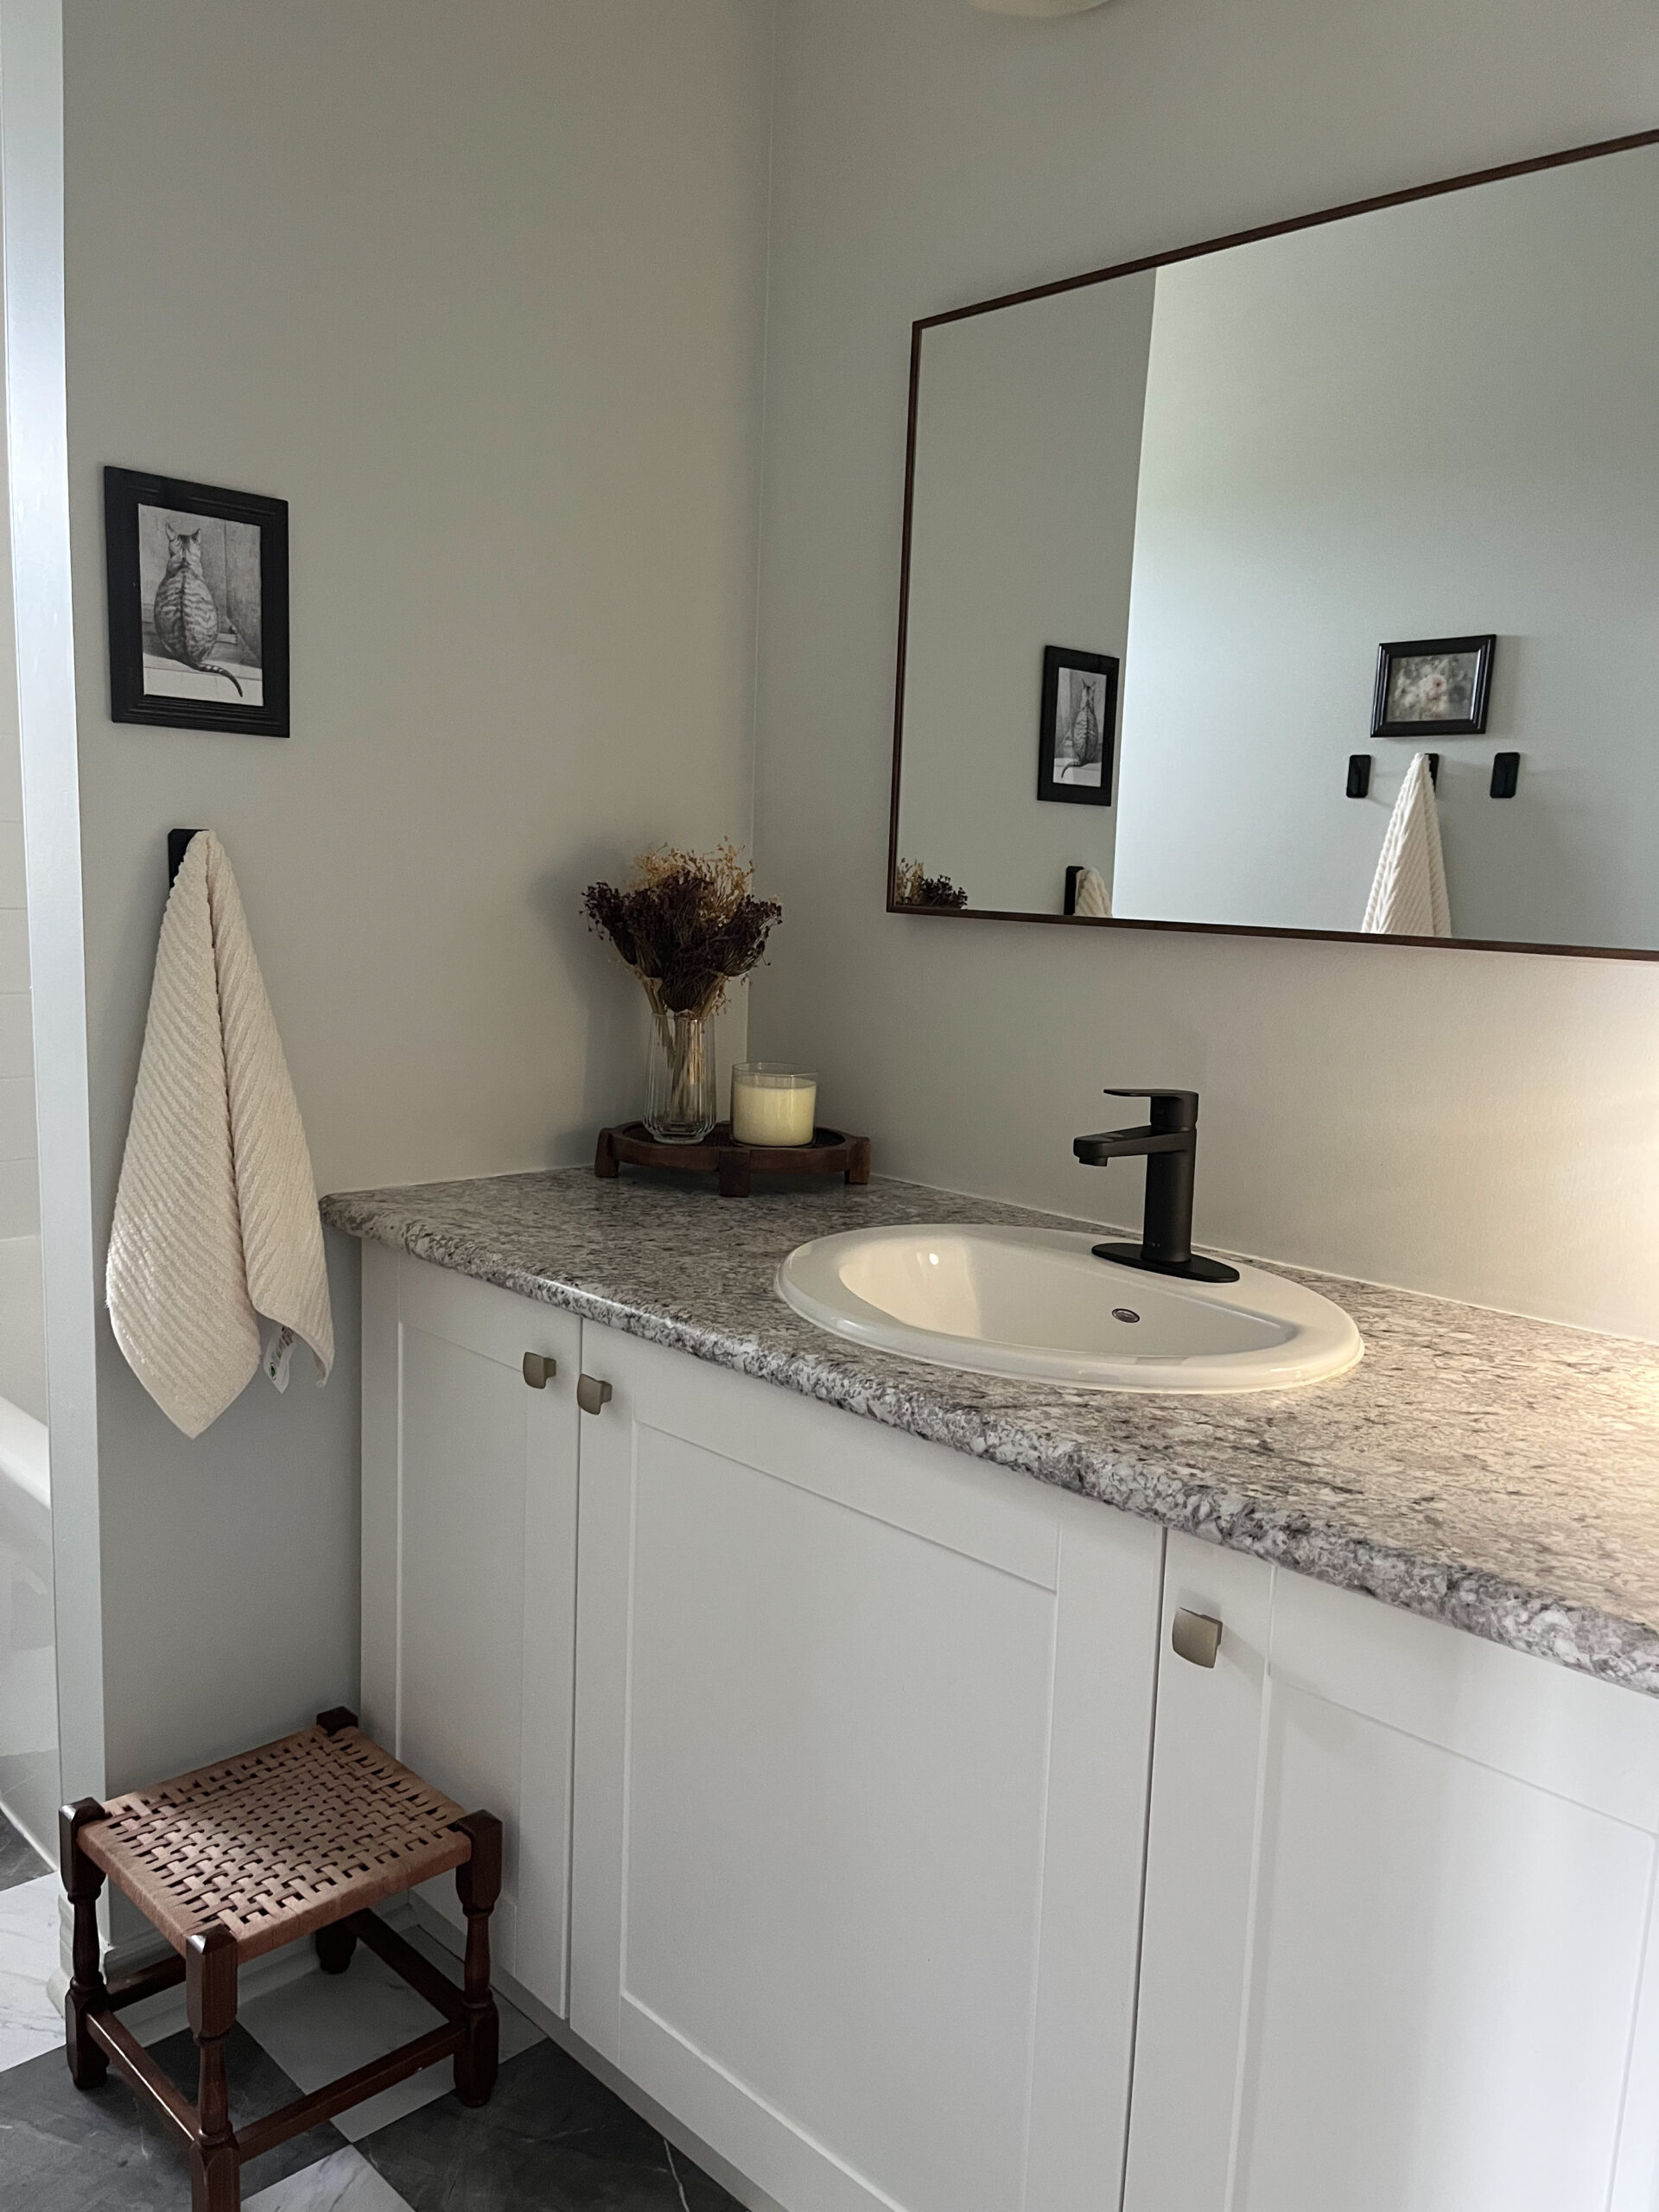
Now for the good part the after!!!! what can I say im a sucker for a good before and after. One thing I love is when my design ideas in my head come to life.
There are many challenges when refreshing a space and I think the number one is budget. It's hard to create the space in your head with such a small budget, but I must say I love a good challenge and for under $350 I think I did a great job with this bath.
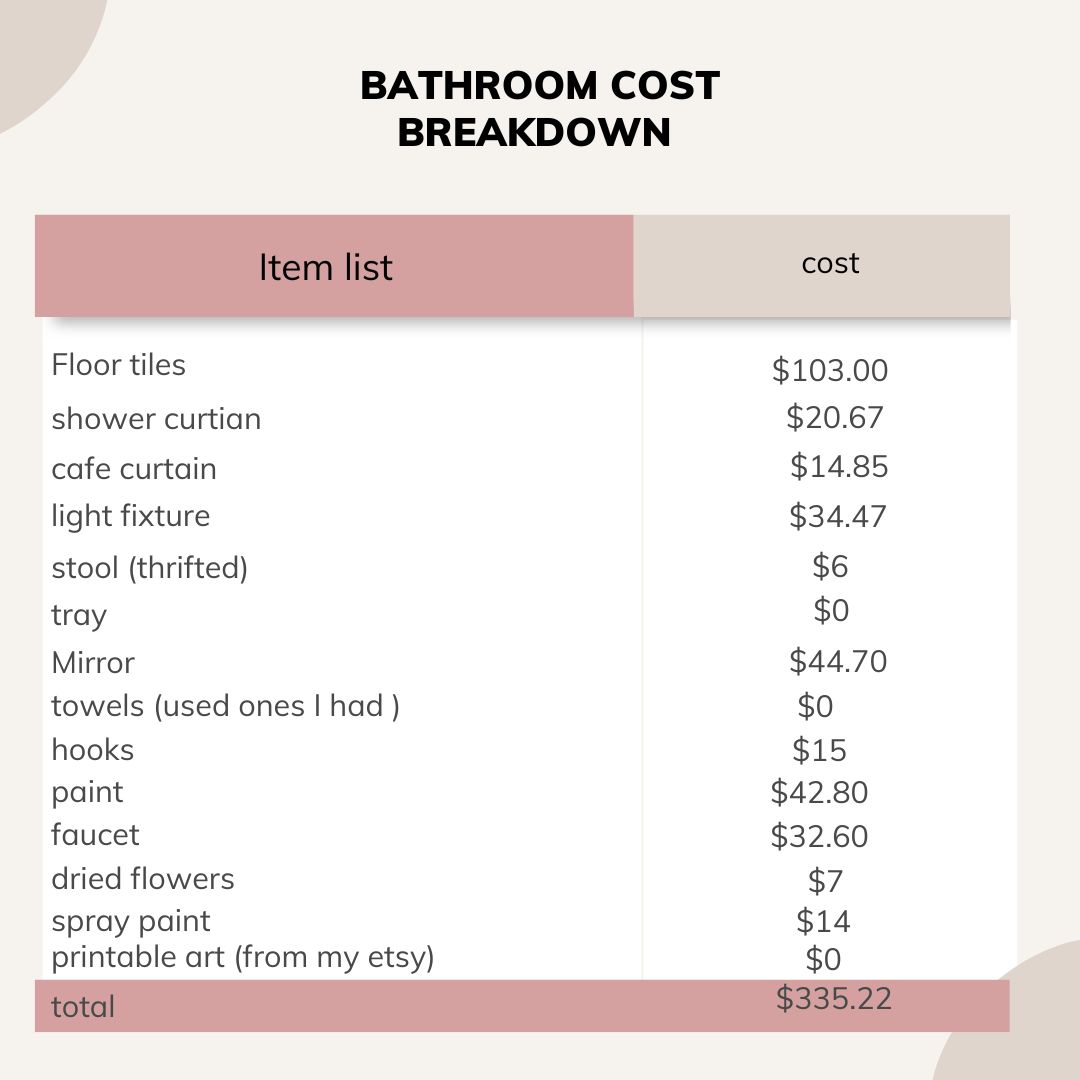
Because I swapped out mirror and wanted to add hooks my total did go over budget, however I sold the old mirror for $60 and purchased a new one for $40 so wasn't to bad. I came in right under the $350 mark.
you can see the cost breakdown at the end of this post I included a chart.
I have always said design can happen in stages as well making it easier for you to have a nicely styled space then later on save to do the more expensive things if needed.
After
Want to shop more of my home and see how I did other rooms on a budget? check them out here
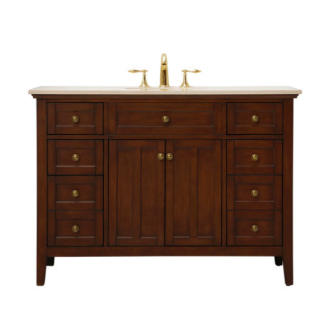
If we were staying here and had a large budget we would definitely change out the vanity and sink I would have loved to do something really warm like a dark walnut with marble top, and would change the bath tiles to something a little nicer and modern.
Here's an idea of what I was thinking of for the vanity. I thought this would be a great option to warm up such a cool tone palette but either vanity works well in this space.
Below is a cost breakdown of the bathroom, I would like to say some of the items on the list were on sale when I purchased them.
Amazon does fluctuate in cost so wait for things to go down in price. She of the decor items in this space are abit more you just have to watch the price and purchase when its low.
Did you know that marketplace has a free section? they do and they have lots of great items like mirrors, baskets, trays and art. check out market place free section before starting your next home project to help your budget stretch a little further.
Want more free home decorating ideas? check out my post 10 ideas to decorate your home for free.
I already had caulking and wood frames, tray, towels, and vase. I spray painted the hardware and light fixture so I could reuse them to help with budget.
I did have to get some help with the flooring around the toilet but the handyman was doing other things in our house so they didn't charge extra to help me.
Shop everything in this budget-friendly bathroom makeover here
Picture frames (thrifted)


0 comments