Welcome, we are so excited you are here. We finally received the keys to our new home. Follow along with us as we renovated and decorate our new bungalow.
We are calling this project Bungalow in the Burbs. I couldn't be more excited to share all my ideas with you.
Now, this isn't your typical home design blog with before and after photos. This is more of a before, how we come up with the design plan, creating the space step by step, and the after.
We will also include budget, cost of each project, and money-saving ideas for all your home projects.
My style is more eclectic. I like a little something from multiple design styles. I have always based our home decor style on how pieces make us feel rather than categorizing it in a specific decor style.
For this home, I really wanted it to feel warm and cozy. It gives this cottage/cabin feel because trees surround us and the beach is close by as well.
We picture a rustic cabin look, but less Canadian/American style rustic and more European rustic. Less heaviness, we don't want to make the home feel heavy with putting wood or rustic elements everywhere.
Instead, pairing it back a little and for every wood or rustic element, adding in some modern, vintage, and traditional pieces as well.
Below you will find a mood board with the overall aesthetic we are going for in our home.
Warm colour pallettes browns, creamy white, greige. Mixed with dark rich wood tones and warmer walnut.
Bungalow in the burbs project

First up for the Bungalow in the Burbs project.
We are replacing the floors with LVP flooring. If you have never tried LVP flooring, we highly recommend you do if you have kids and pets.
This will be our third home that we have LVP flooring, and they have come a long way.
They are water proof,industractable when it comes to kids and pets and there are some brilliant companies that make LVP look pretty close to real wood.
We chose Cortec XL plus in Monterey Oak. We went through about 30 samples until we picked one but i am very confident in my choice.


Here is the sample of the flooring, and we are running it through the entire house and upstairs in the loft.
A blog post all about the flooring I will do next cause I have learned a lot.
I will say LVP flooring will never look like actual wood exactly, but we love is the durability when you have kids and pets.
The cortec flooring in Monterey oak is beautiful and so warm I love it. However, the colour variation doesn't look great in some lighting, and in photos, but in person I do like it. The boards are 8mm wear layer, 7'' wide and 48' length.
If I had to do it over, I think I would have gone with maple syrup by twelve oaks, because there wasn't much colour variation. However, the boards were 9" and 60" long so I was sure if they would look right in some of the smaller spaces.

This is what we started with. We removed the kitchen so we could install the flooring properly. This was not a simple task, definitely necessary. We have cut corners in the past and never been happy with the outcomes. We took the extra steps this time around.


Now we know it seems excessive to remove brand new tiles, but the builder wouldn't work with us and we hated the way the tiles looked in the space.
For us to lay the LVP, we would have a bunch or transition pieces, which is one thing we were trying to avoid.
Next up we decided to just go for it and reno the kitchen.
Originally, we planned on doing minor projects and then when we moved in to tackle the entryway area first. The only solution to the issue with the tile floors was to remove them, install a subfloor, and then lay the LVP.
The kitchen had to come out, so we figured we would get the countertops replace now instead of later. Then it just snowballed, and we figured we would complete the kitchen first.
We went over everything that we wanted in the kitchen. Then went through the most important ones because we didn't have enough in our budget to do everything.
Our kitchen wants
- Quartz countertops
- Hardware
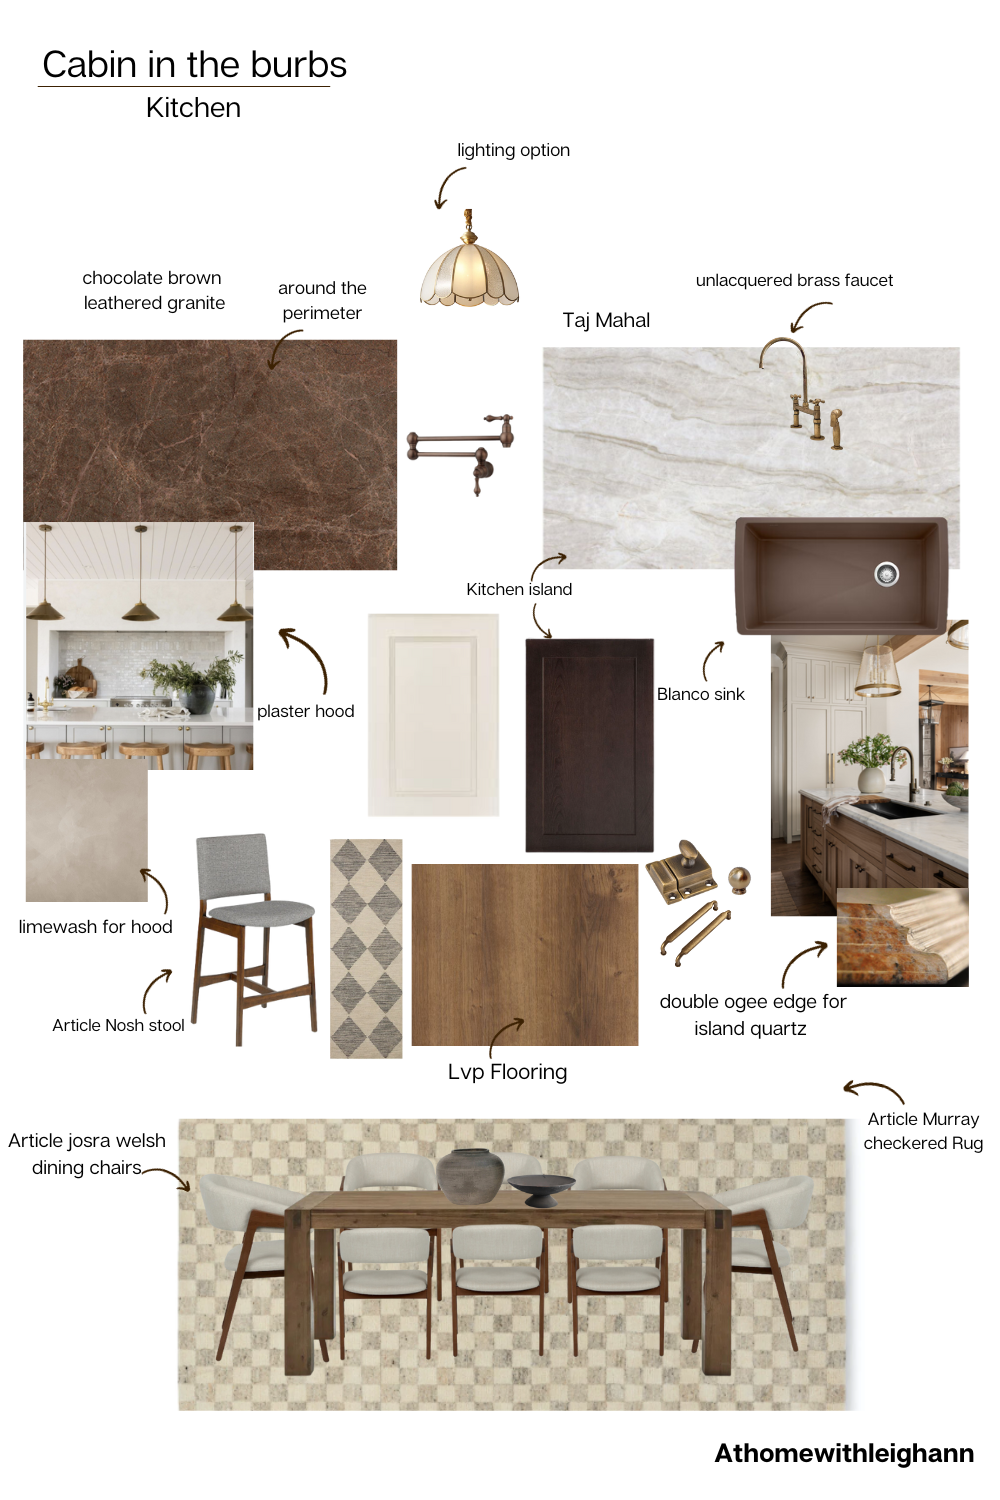
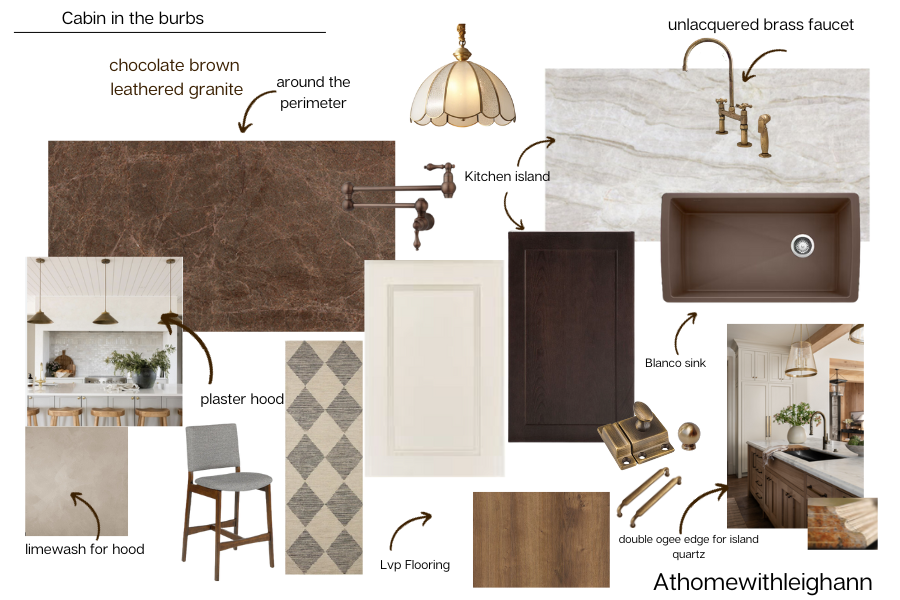
- Custom plaster hood
- wood panel the ceiling
- Arched doorways
- two pantry cabinets with a bench under the window
- moulding
- Lighting
- blanco sink
- unlacquered brass faucet
- kitchen table, chairs, and stools
- Pantry cabinets and built-in bench under the window

These are our countertops left is chocolate brown granite. I still can't believe I found this. They were discontinued it since 2010. It will go around the perimeter of the kitchen and backsplash. On the right is the Taj Mahal quartzite. This stone is so beautiful. It's very pricey almost as pricy a marble, so keep that in mind. However, we have a friend that go us an amazing deal it fit in our budget so this will go on the island. I chose a leather finish. The profile we chose is a double ogee edge detail, and I am so excited about it.
After going through our list, we knew right away the kitchen will have to be broken into 3 phases.
In the first phase we chose all the must have things
- countertops
- backsplash
- sink
- faucet
- hardware
- plasterhood
- kitchen table and chairs
Second phase after we move in and get settled.
- lighting
- pantry cabinets
- moulding
Third phase, which will be in a year +
- wood panelled ceiling
- arched door ways
Breaking down our larger renovation projects into phases helps us budget better. Sometimes you have to sacrifice wants and needs.
This allows for you to stick to a budget, and still get a space that functions and you love, allowing you to add to it later.
Follow along on our Instagram @athomewithleighann for daily updates and more home progress coming soon.


0 comments