
Nothing like a good DIY project. Here is my DIY Ikea dresser makeover. This one is an easy one. want to see how I updated my lack lustre TARVA IKEA dresser to a high quality look one? stick with me this is simple, easy, and affordable DIY. All you need is a can of paint, some new hardware, paint roller, and some polycrylic to seal it all in.

So before we get into this easy IKEA dresser makeover just to go though where I started I had already painted the TARVA dresser a warm grey although I loved it, it wasn't the look I was going for in my new home.
I wanted something more high end looking, I thought about buying something new but quickly discovered that the nice quality ones were well over my budget, with one of my favourite tally in at over $4000 I know I was going to have to DIY it to get the look.
I was going to add some paint to make it look rusted and distressed like the west of main one but when I painted it I loved how it turned out and I wasn't confident that I could do the distressing correctly lol.
I will keep you updated if I decide to try the distressing but for now I loved how it turned out.
I couldn't decide if I wanted to do a soft black like my beloved dresser by west of main, man this is beautiful.
After hours of looking through Pinterest and paint swatches I realized I wanted more of dark brown than black.
I also knew I wanted to find better quality hardware as well and really like the look knobs instead of pulls, so I did spend abit more on them to get the quality and boy am I happy I did cause they just finish this dresser off so nicely.
Okay let's get into the DIY IKEA dresser makeover
What you will need:
- Paint of your choice, I highly recommend Benjamin Moore paint their advanced line or regal they are a favourite over here and they have always held up so well on my furniture.
- sand paper or shellac primer
- Paint brush
- small roller
- sponge brush
- polycrylic
- hardware
- screw driver or drill

Want some more decorating ideas check out my bedroom makeover
Step #1
Fill in any holes with wood filler I decided to do knobs so I filled in my holes so I could have two knobs instead of one handle in the middle. what till dry then sand.
step #2
I did a light sand all over the dresser, I didn't seal mine last time so just did a light sand if you have a sealer on yours I would try to sand it abit more or use a shellac primer first. Shellac primer

step#3
Wipe off dresser with a lint free rag making sure there is no dust on it, you don't want that because you paint won't come out as smooth.
Step#4
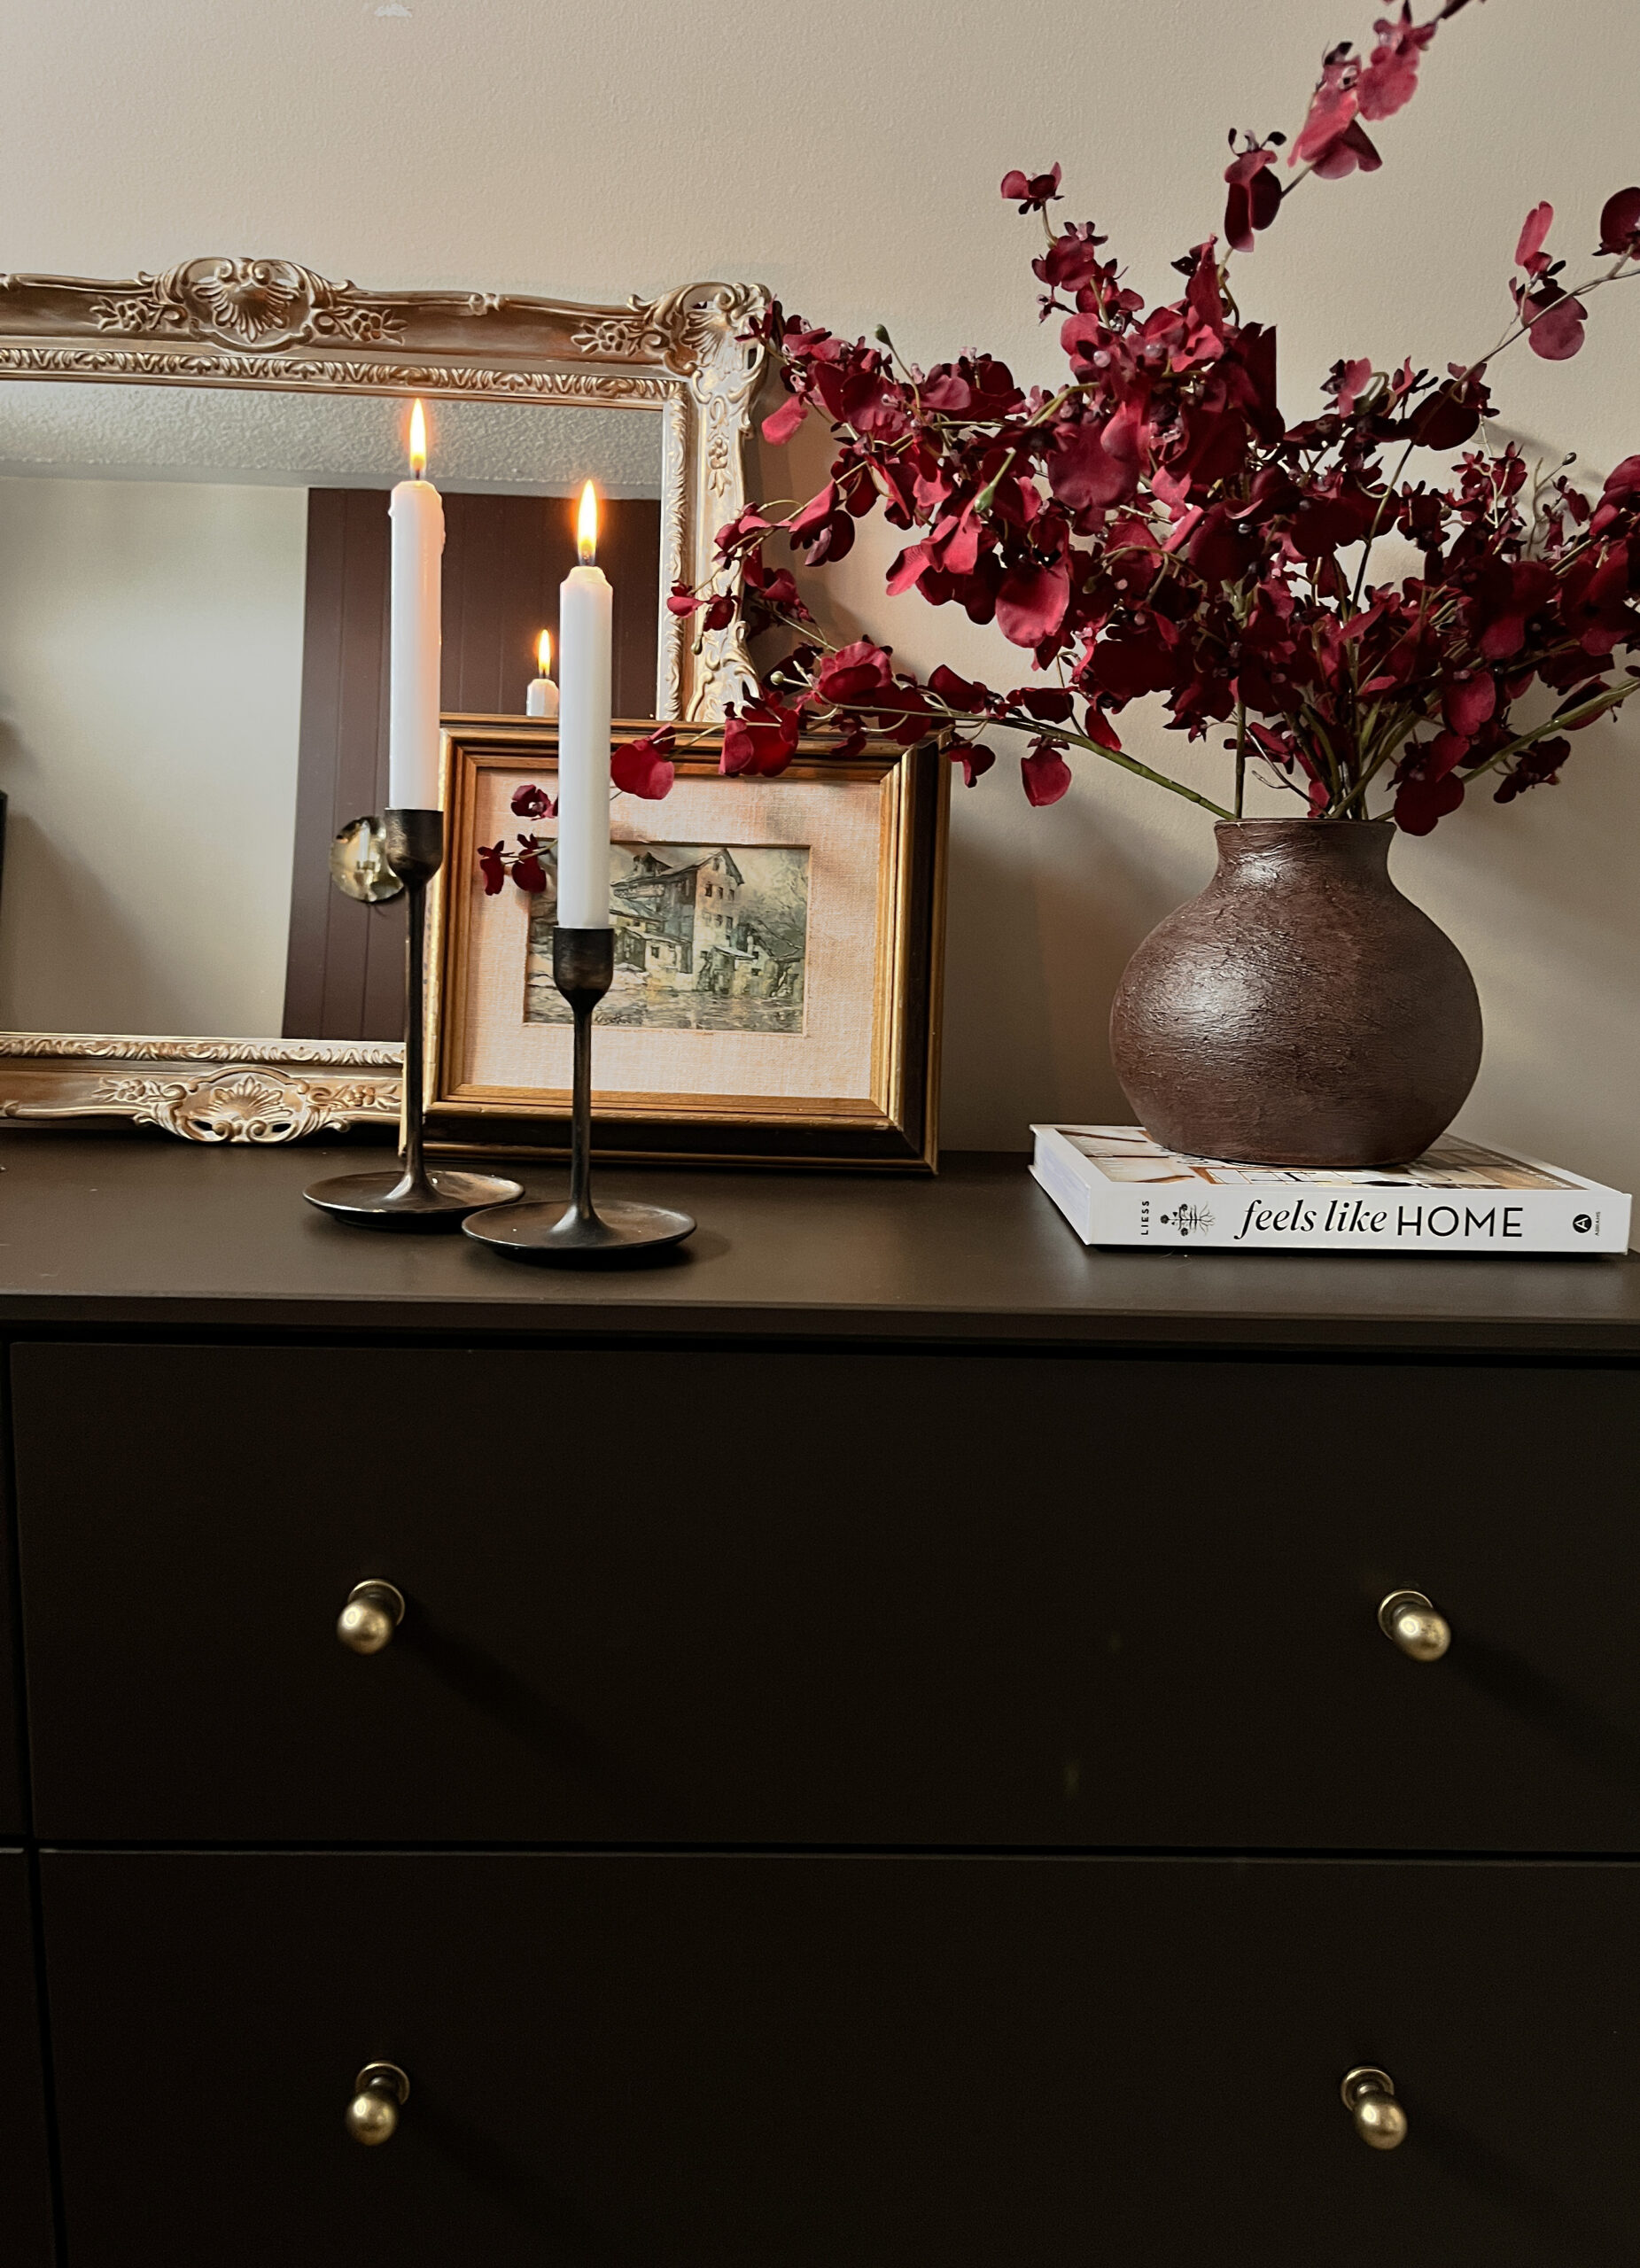
Paint I wanted a deep chocolate brown colour so I went with bittersweet chocolate from Benjamin Moore in a satin finish (Regal) This is just the best colour I think it make this dresser look so high end I did three coats.

It is a soft black with a brown violet undertone. So rich and yummy. Its LRV is 5.1 so its dark but not black
Ley dry for 24 hours with drawer open
Step #5
Apply polycrylic water base sealer all over dresser side to side with a foam applicator.
I did 2 coats wait 24 hours in-between coats. I think one coat was good but I did two because my cat jumps up on the dresser all the time and I wanted to ensure she didn't chip it but one coat is all you really need.
Step#6
Measure where you want to put your hardware drill holes then screw in. Voila you are done!
Tip I would wait a few days for the paint and sealer to cure then decorate the top of the dresser.

I hope you liked this easy IKEA dresser DIY. I highly recommend painting your IKEA dresser Its a great affordable way to make your furniture look custom.

everything else is thrifted
I would also so say splurge on hardware for your IKEA furniture It really makes it look more high-end. Amazon knobs (Highly recommend these knobs)
Thank you for checking out my IKEA dresser makeover.
Looking for more DIY ideas check out my bathroom refresh I did for less that $350

0 comments