Grab a cup of coffee and stick with me, by then end of this article you will feel more confident and learn some great tips on how to make a gallery wall at your home.
How to make a gallery wall at home

Firstly, can I just say, I think the best gallery walls are ones that are curated. Don't over think it.
Today's design style is more eclectic, organic and less thought out so we can create more authentic lived in spaces.
Don't worry so much about everything being perfectly spaced and what the "quote on quote" rules are, and focus more on how you feel about it.
With all that being said here are a few things you need to know to help you make the gallery wall of your dreams.
1. style of your gallery wall
Choosing the style of gallery wall is the first thing you should start off with. Usually this is based off what your home design style is, but if you're not to sure you can always head over to Pinterest to get some ideas.
So there is really only two options formal or informal casual. Formal is more cohesive frames all the same size or colour and art very similar in colour. Frames will be evenly spaced this a more modern look and adds a polished clean look to your gallery wall.
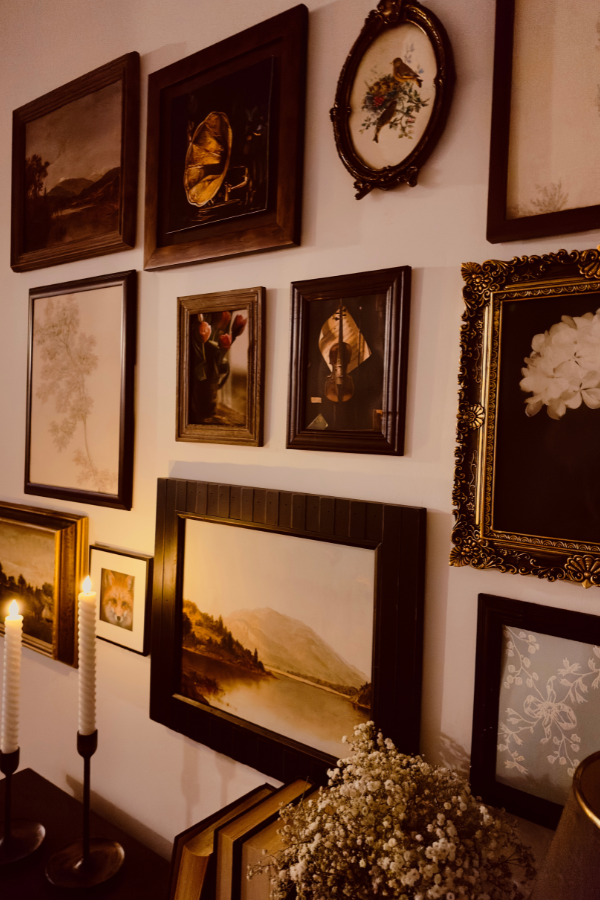
Informal more casual, this gives a more organic feel, frames are different colours, sizes shapes, this is more of relaxed look.
Now for my style I new I wanted our new apartment to be modern/vintage style I think the cool kids are calling it hipstoric and to be honest I couldn't thing of a better name for it.
I decided to go with a more informal casual look because it best suit the design style of my apartment. I really wanted it to feel relaxed, and organic.
Need some art? check out my etsy shoppe for art printable's.
So easy select, download, print, voila! Beautiful art and an affordable price.
I highly recommend posterjack for printing vintage photos they have fine art paper. vintage art just looks so much more authentic when printed with posterjack.


As you will see in the picture below I mixed vintage style frames and modern with a mix of the art too! because my desk and chair are more modern and I wanted to mix the two styles together to give this space some juxtaposition, basically mixing old and new.
I have vintage art prints, some sketch prints, I also put some Wall paper in the frames as well just to mix it up.
Now with the modern vintage styles I think this is where things can just be placed with no rime or reason just hold it up and if it feels right it's perfect!
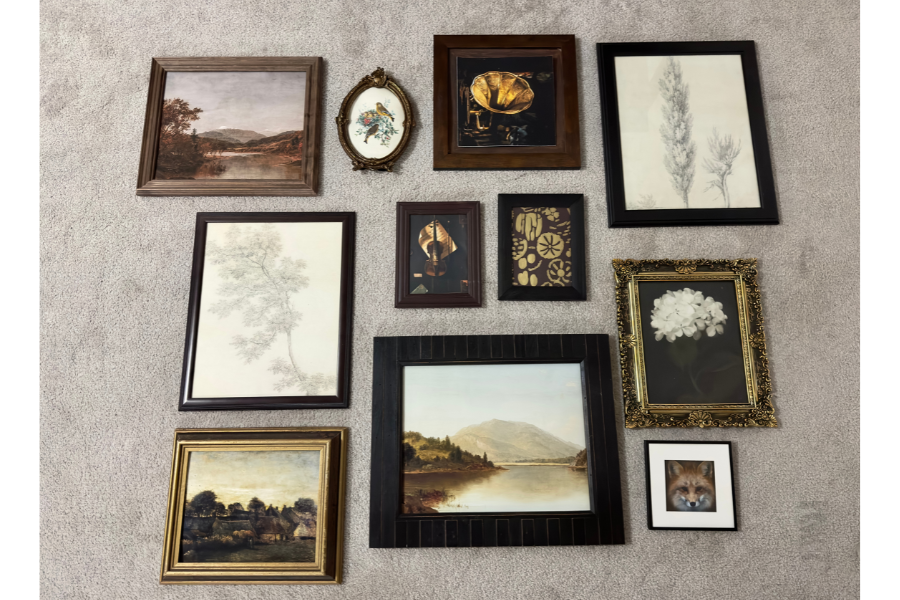
If you are going for more contemporary, modern or traditional look and you are wanting a more of a formal look to your gallery wall you might want a more evenly space out and cleaner look to you gallery wall.
This will take abit more time because you need to measure things out. there is a Pinterest post below that goes into detail and some tricks to getting every frame perfectly spaced.
This example below shows a more formal gallery wall clean lines, fames are all the same colour and style and evenly place on the wall.
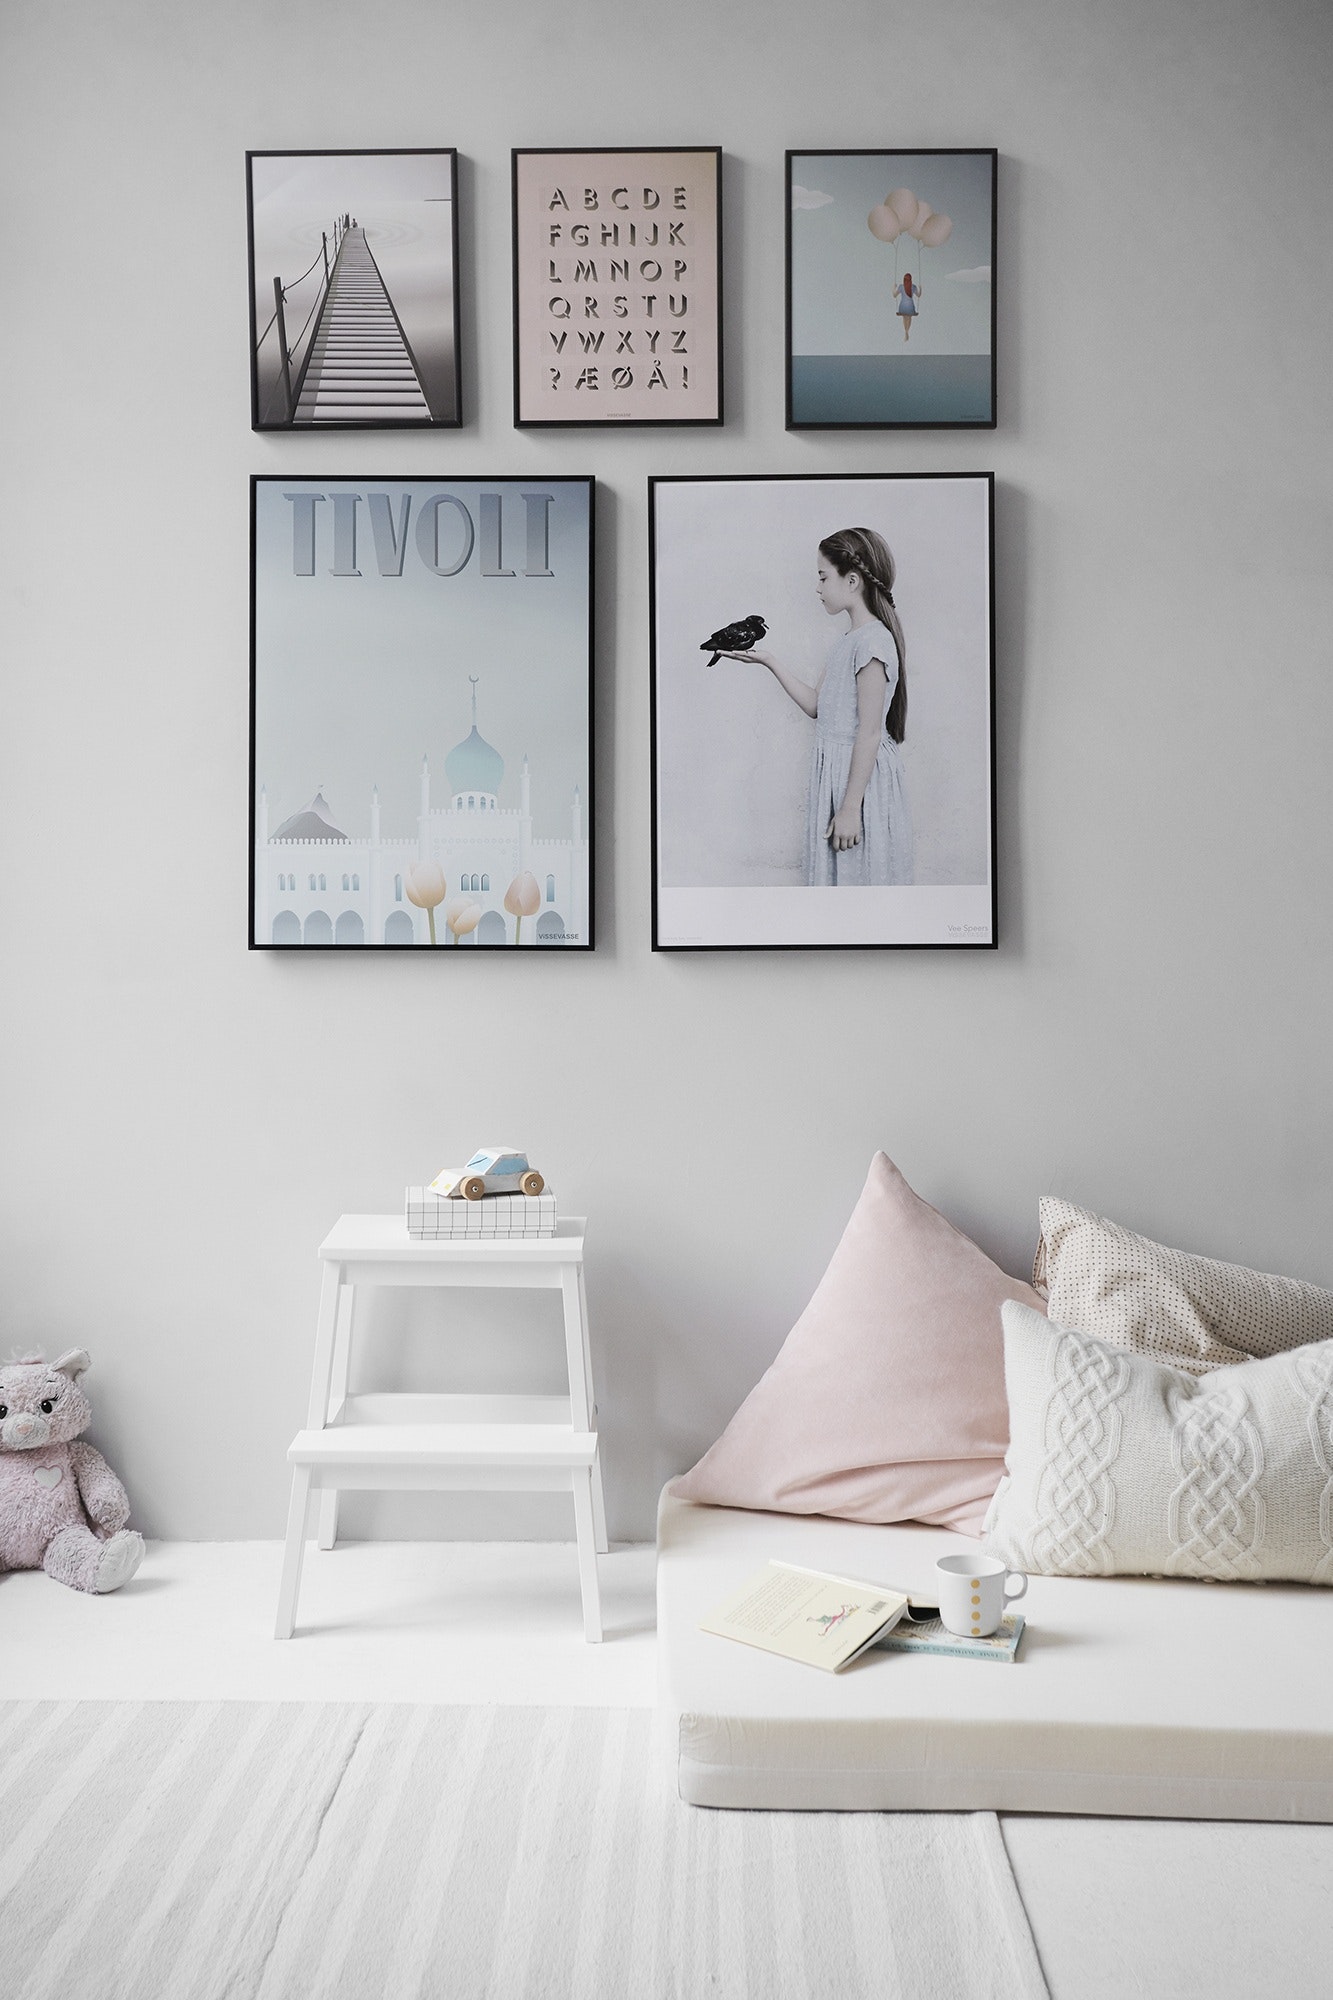
If your going to go this route I would definitely recommend making yourself a guide to follow and take measurements so everything is evenly spaced.
I also think this style does work best with all the same colour and sized frames.
here is a an article that can give you step by step to make this gallery Wall easy.
2. choose your frames
Firstly, you will need to choose frame sizes based on the size of you wall. If you have a large wall with high ceilings you will want larger scale frames and I would say nothing smaller than an 8x10.
If you're going for a formal look like I talked about above you should use all the same colour frames if you're doing a clean grid pattern evenly spaced side by side or up and down.
Now if you want it to be a bit more random but still want a formal look then you can change up the sizing and colour I would stick to 3 colours lets say black, white and gold or you could do wood as well, and mix your frame sizes as you please.
changing up the sizing adds more interest having a few larger, medium and smaller frames really adds interest to your gallery wall.
Tip always start with the largest frame first and work from there.
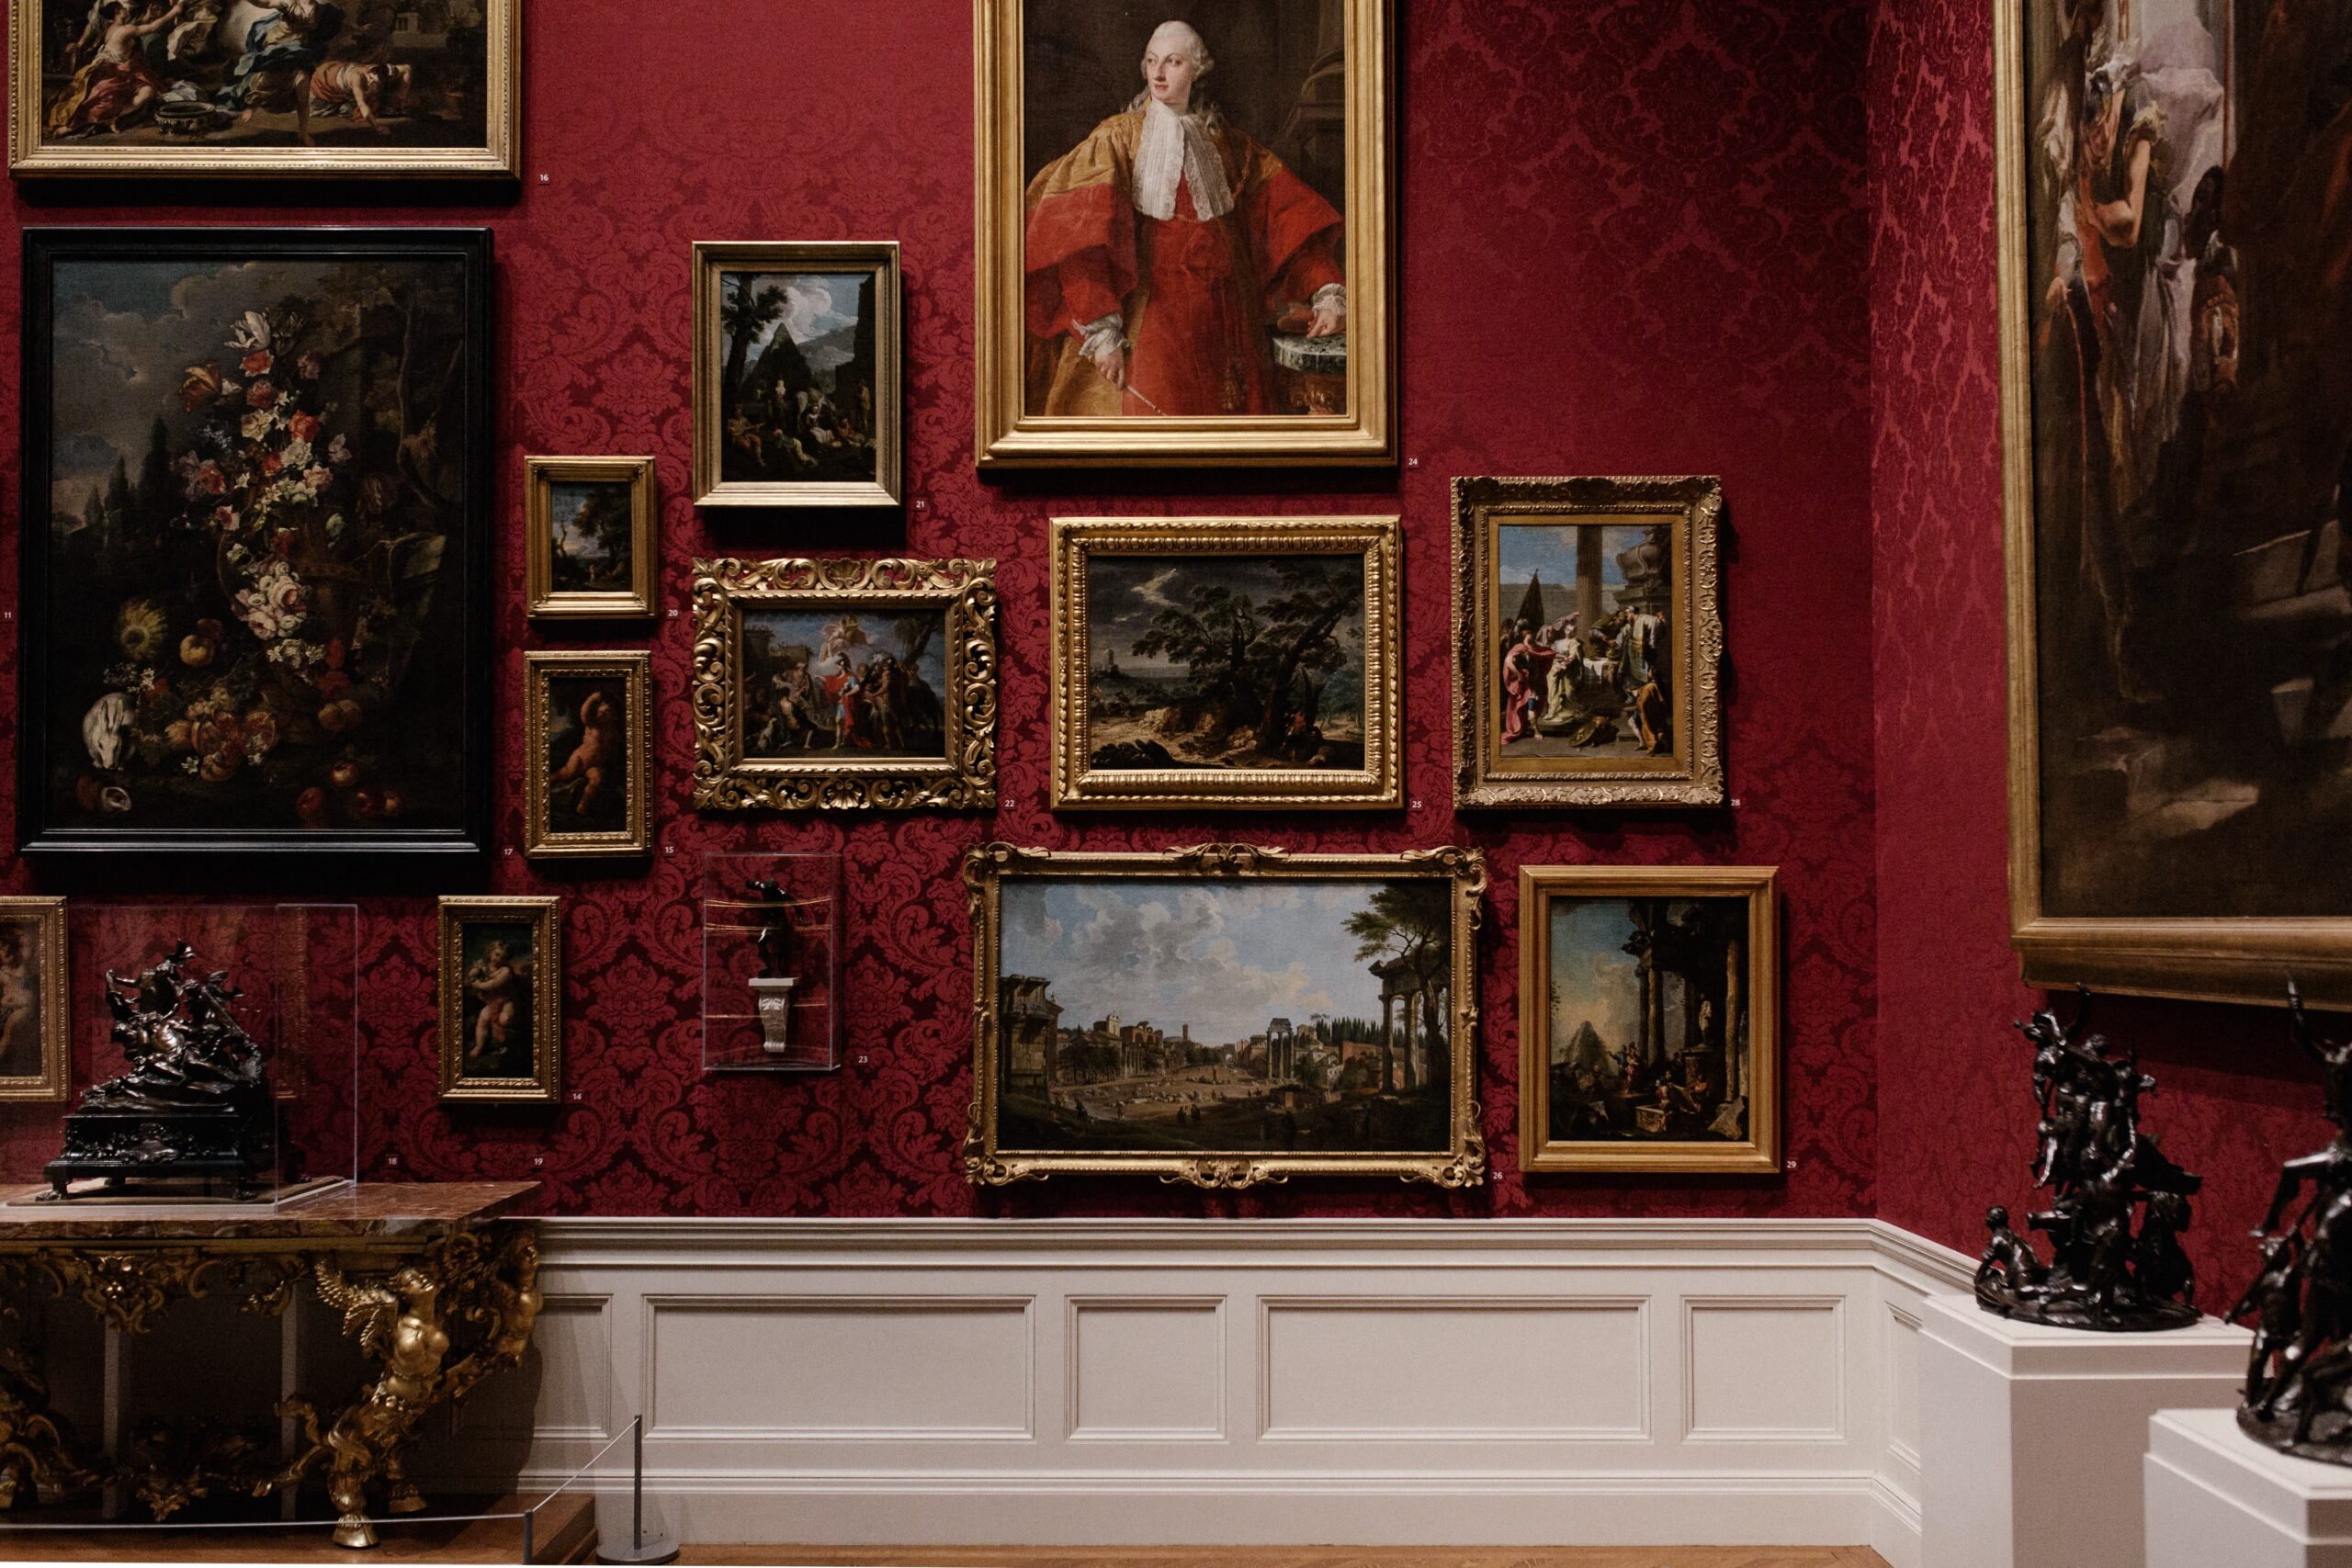
If your like me and you want more of an informal electric look more relaxed and effortless then I would have a bunch of different style frames. Again pay attention to colour and tone all though this is eclectic, it still needs to make sense we don't want it to look messy.
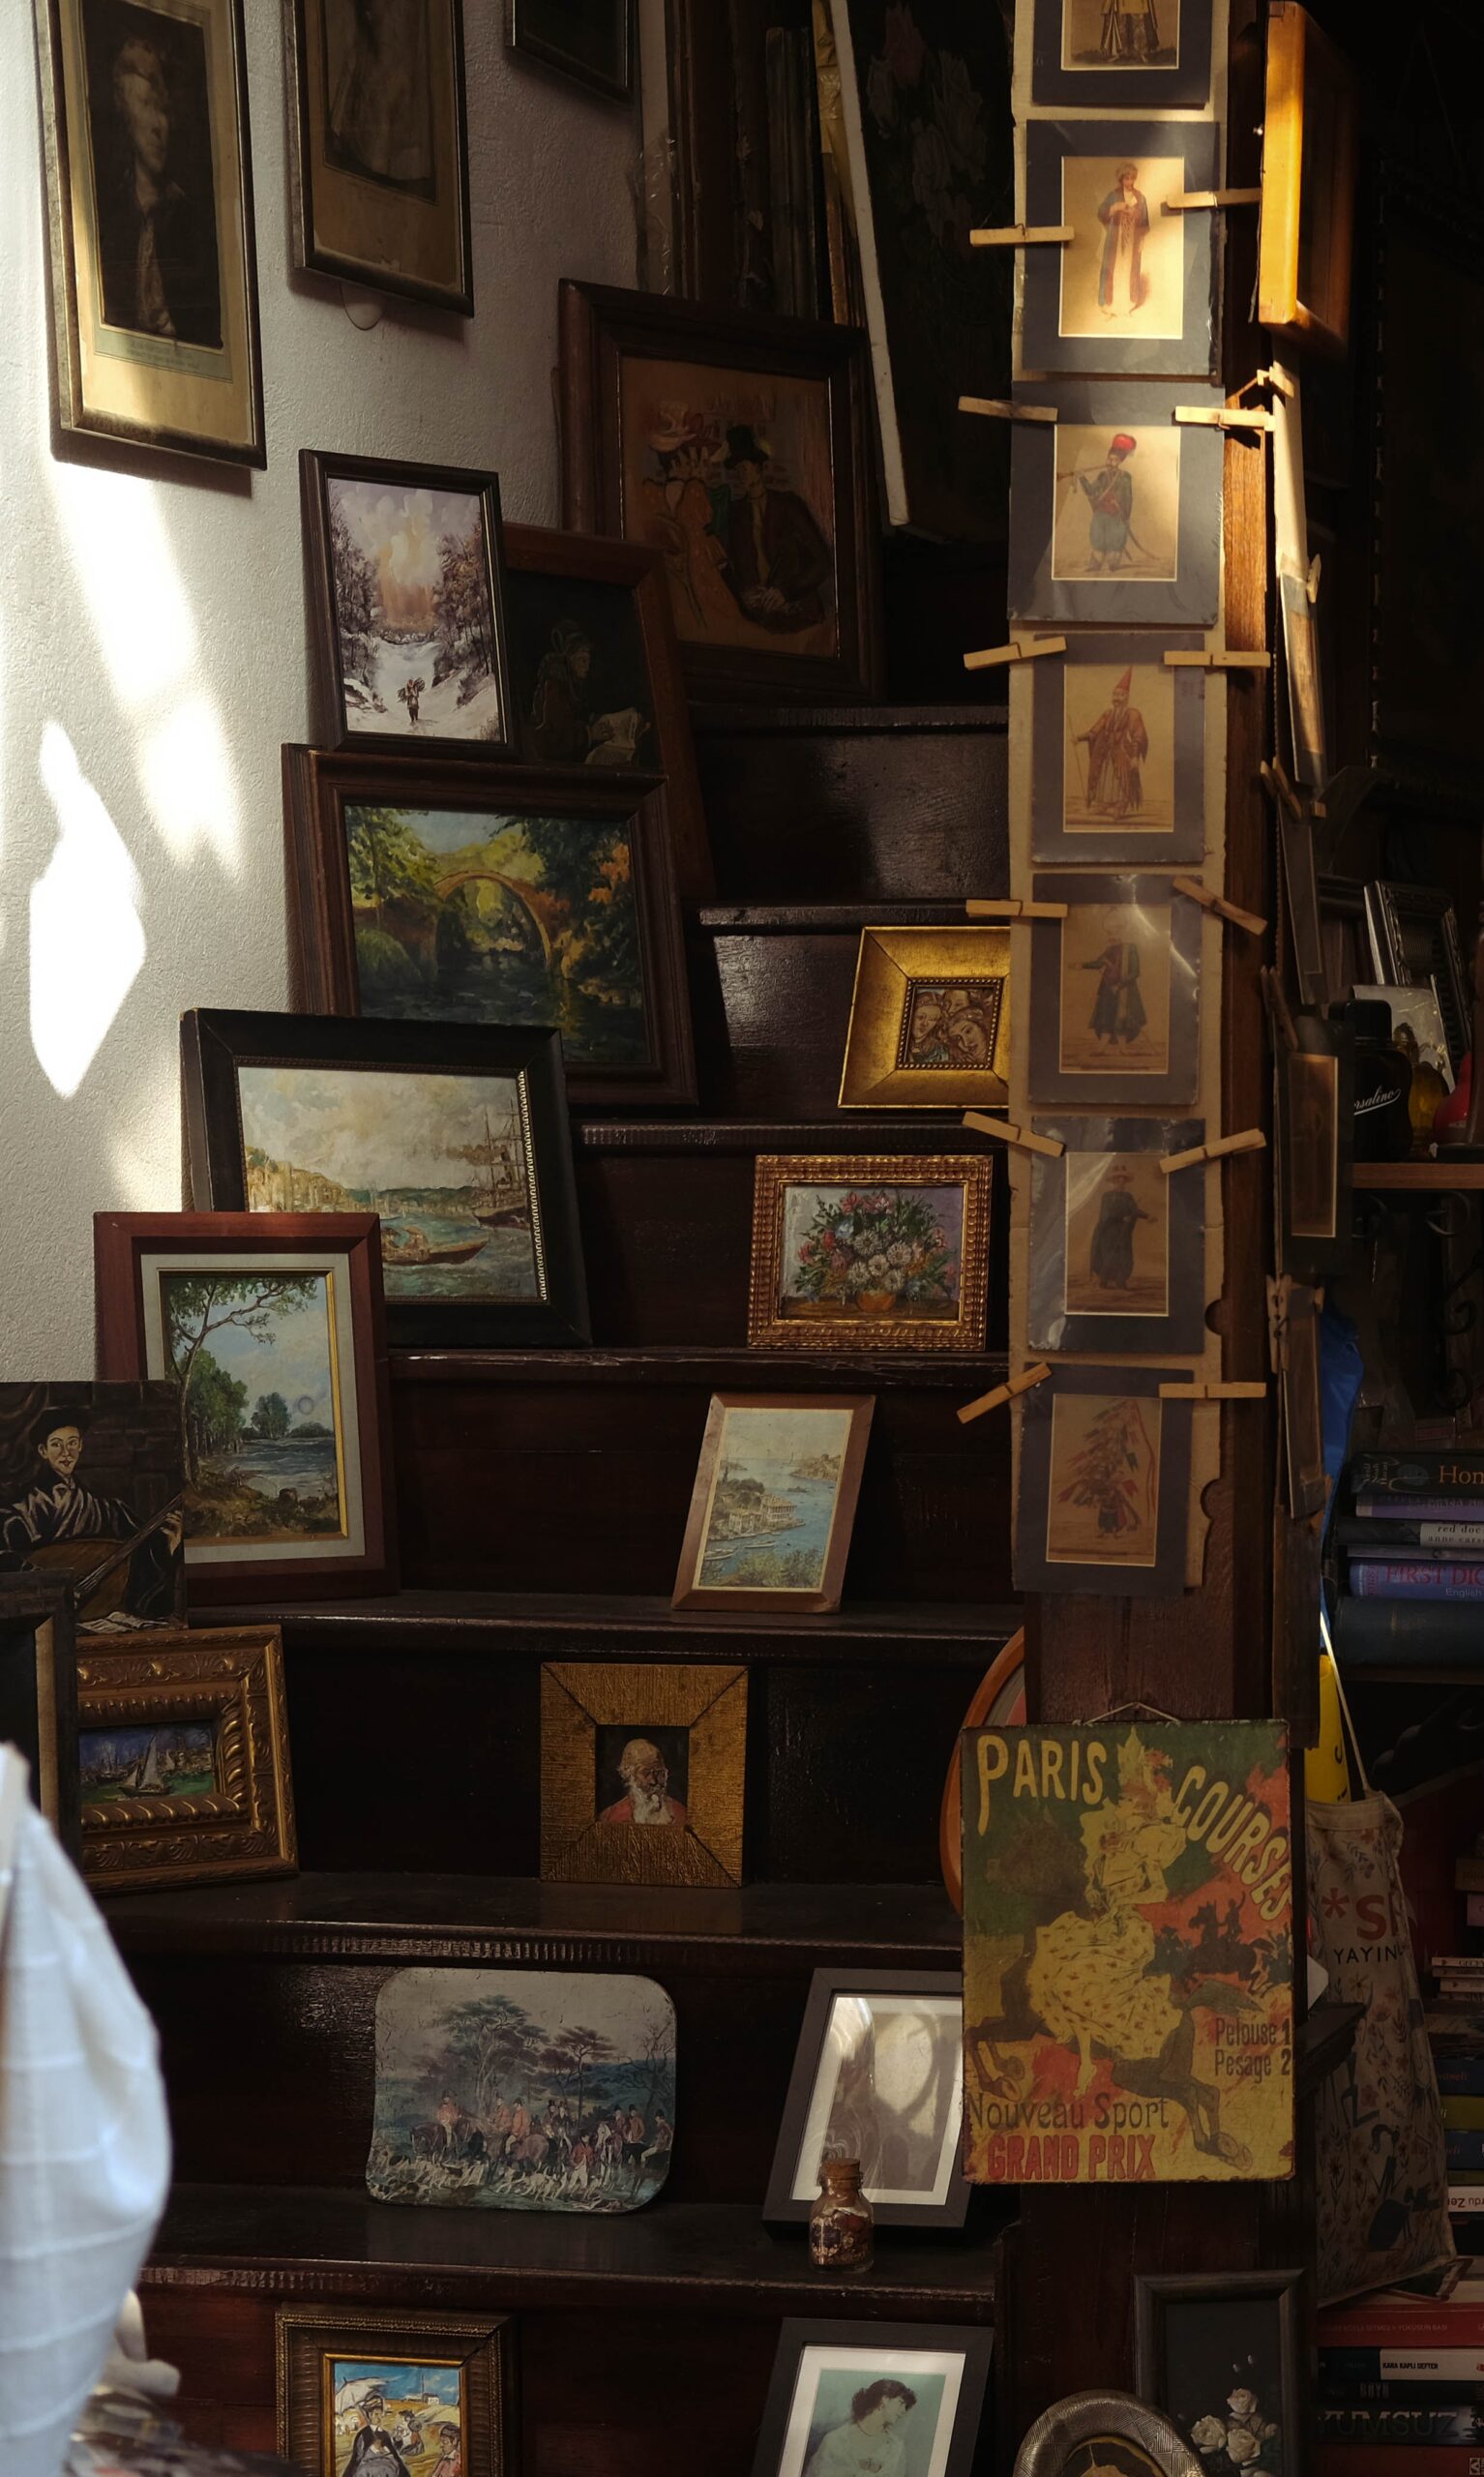
Thrifting frames, and adding in new frames works perfectly as long as the wood tones are similar and same with golds or silver whatever you are using just make sure the colours are coordinate well with each other.
Another great tip is mix in different shapes such as oval frames or arched frames this will really add to the relaxed effortless look you are going for.
3. choose your art
For many this is a hard one. Again I think it best to choose art pieces you love. They all need to speak to each other to make it flow together but make sure your adding your personality to your gallery wall.
If you love the beach then incorporate beach themed art. If you love travel than maybe include places you visited or places you would love to travel too.
suggestion if you're not sure abstract art or water colours are great too. You could add some sketch are or some floral art, the sky is the limit.

art print the vintage fox shoppe ( more prints coming soon)
If you're like me and your going for an eclectic vibe vintage art, is great and you can add other sketch art and places of travel as well but make sure the colour palette is all similar.
That brings me to my next big tip make sure your colour palette is cohesive. Make sure all your art pieces have repeating colours. This will make it feel calming and it will help it to flow together.
Some of the prints I am using are lighter in tone and some are dark and moody while others at mid tone and neutral.
designer tip pull colours from your room. if your gallery wall is in your living room and you have blues, white, browns and some gold accents incorrpreate all those colours in your gallery wall art and frames.
Okay with all that being said rules are meant to be broken and if 2023 design style has taught us anything it's that there are always expressions to the rules.
So have fun with it if you want to add a bright red print in a sea of neutral I say do it! I mean who's stoping you it's your home and if it feels right and most importantly it makes you smile do it girl.
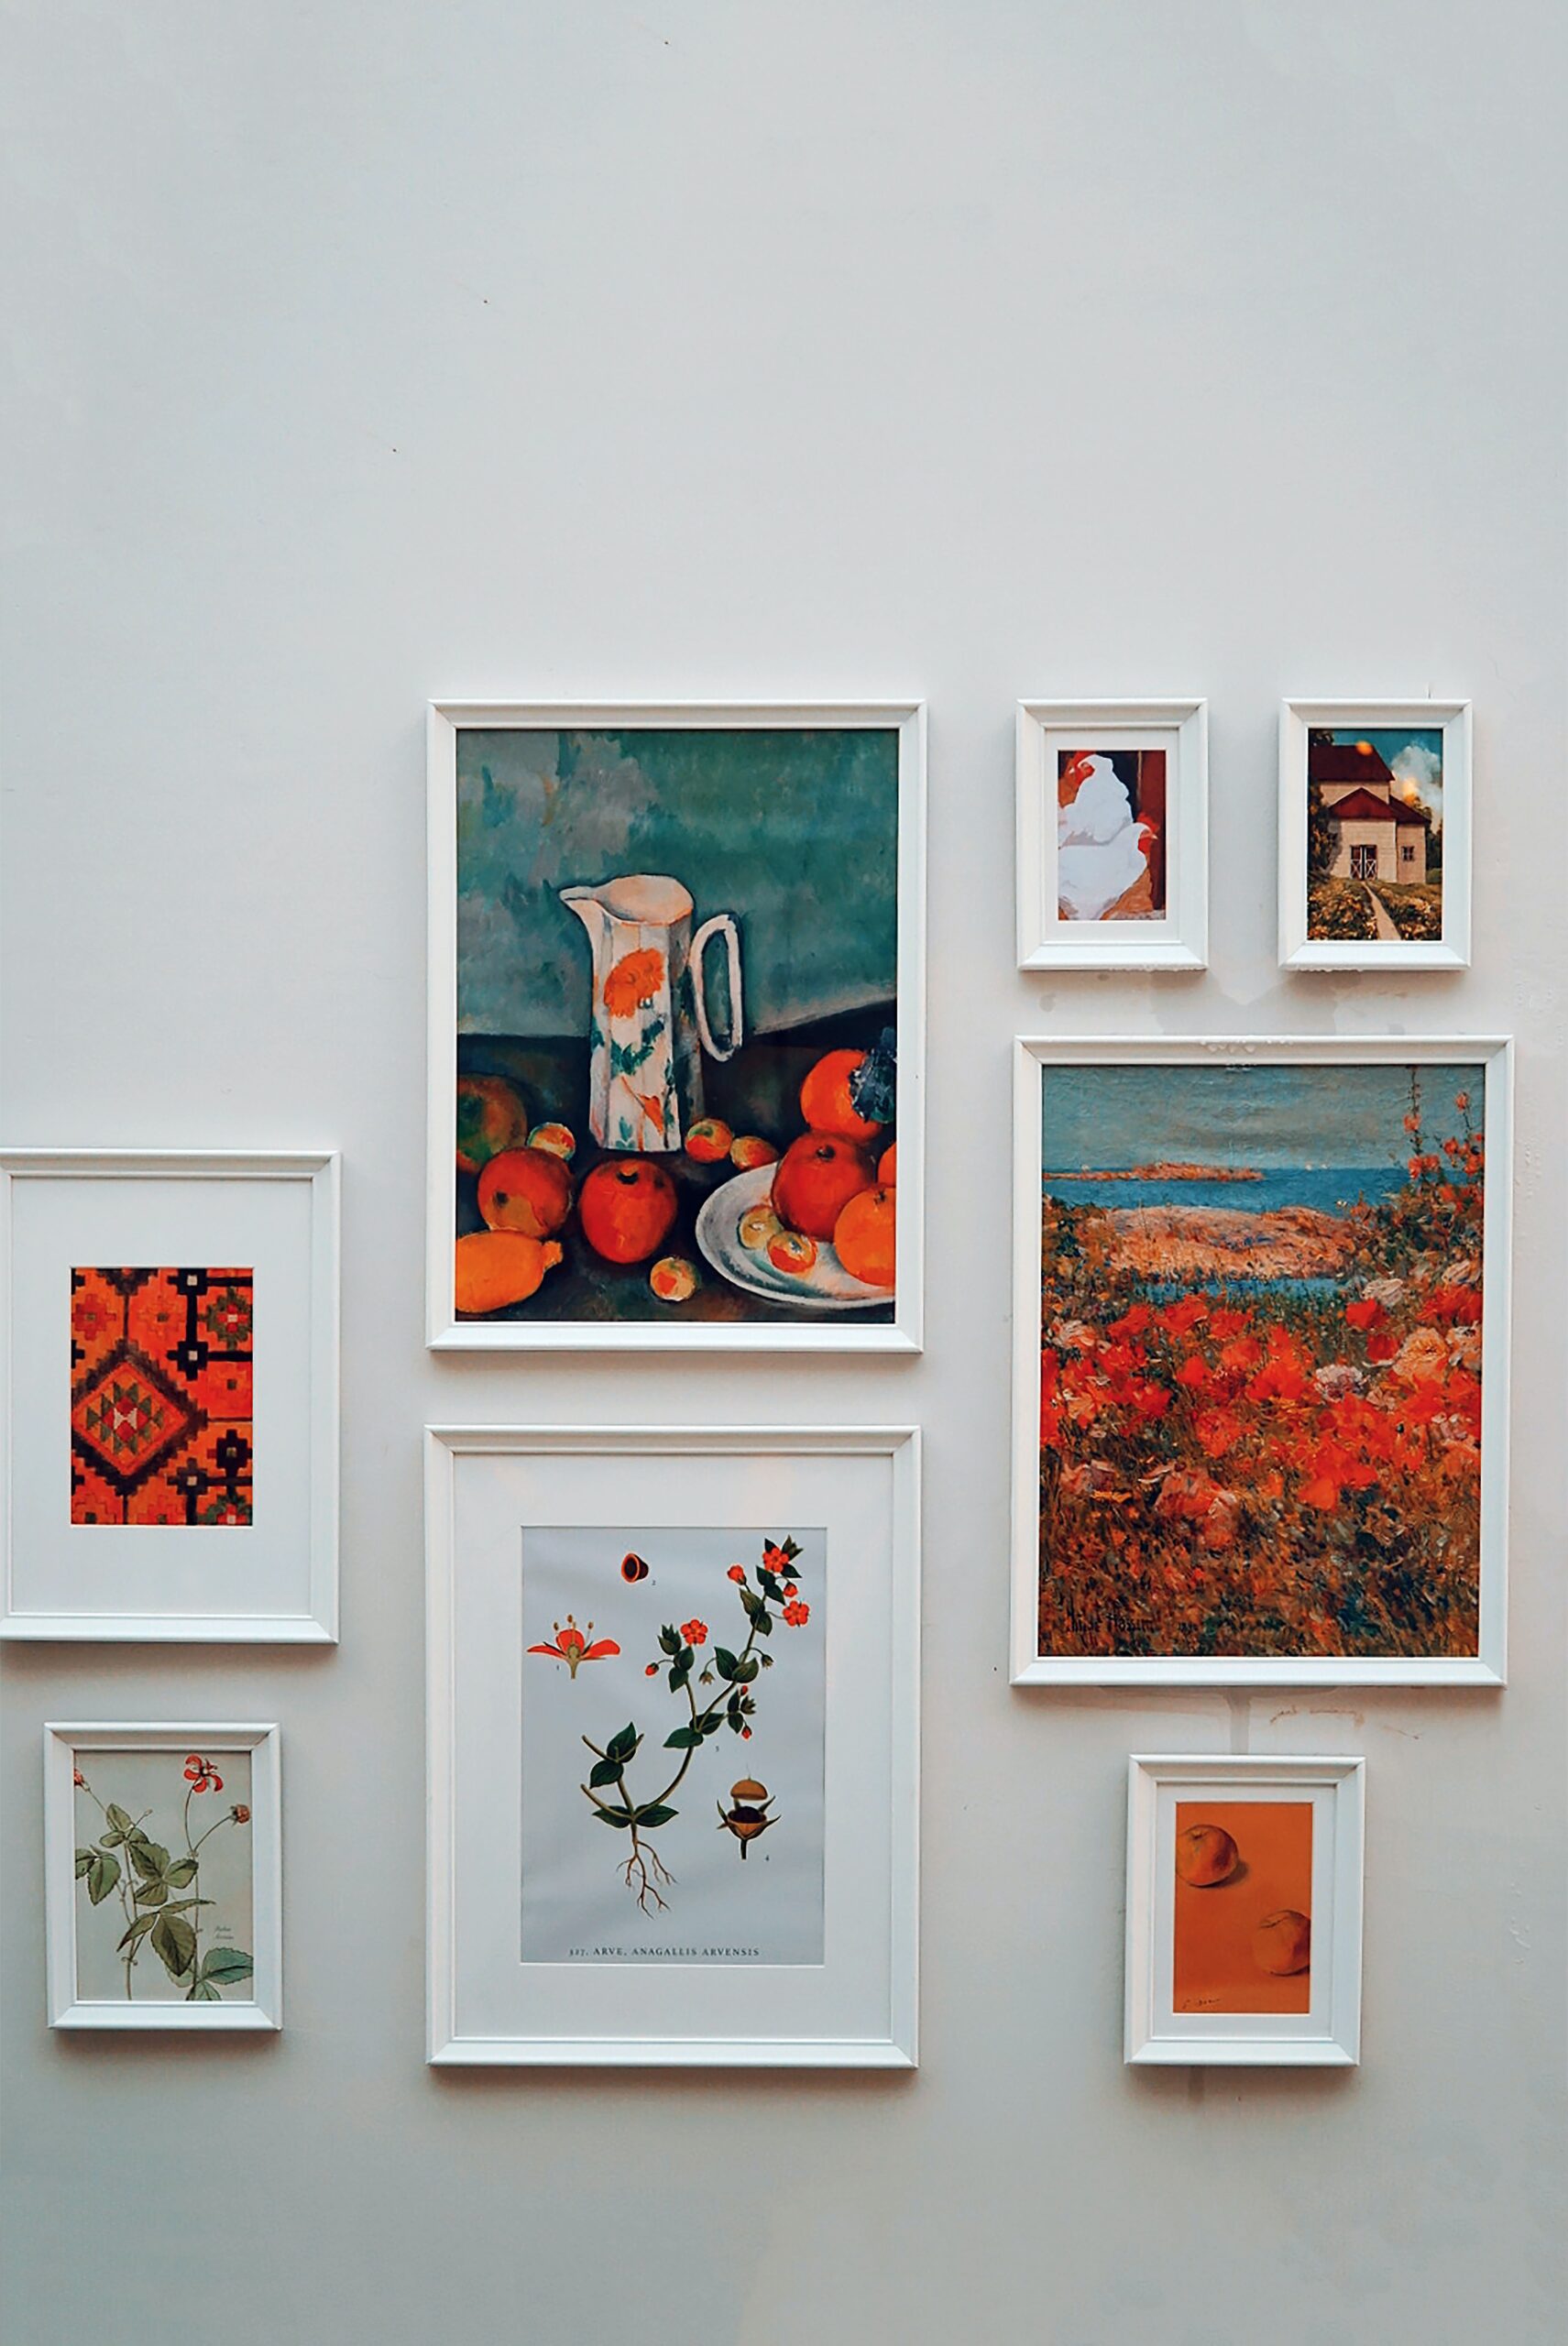
Because I know choosing art can be challenging and expensive here a few websites that I love and so many printable art pieces to choose from, and some even offer framing as well so this makes it even easier for you to achieve the best gallery wall at home.
4. consider decor
Before we get to mapping out our gallery wall you will need to think about the decor or furniture placement in font of your gallery wall.
If you are doing your gallery wall above your desk or a console you are probably going to style these spaces.
If you have a lamp or computer screen or a mirror you might want to consider where you art will go.
In my opinion I like when things over lap a little so if my lamp of plant slightly covers some of the gallery I'm good with that.
If you don't like that look then make sure you gallery wall starts a little higher to accommodate your decor pieces.
when you are placing your gallery wall above a sofa I feel it's best to make sure the sofa and the art have at least 8 inches clearances I don't really like when the sofa cover part of your gallery wall, I feel like placing art that low doesn't look best, and having a large piece of furniture in front of some of the art just makes everything feel heavy and doesn't flow as nicely.
5. Gallery wall layout
Now that you have all your frames and art selected its time to plan the layout.
Like I mentioned before if your going with more of a formal look then this is going to take you a bit of time measuring your area and the spacing for the frames.
ultimately it's up to you but I do think a 2 to 3 inch spacing when doing a more formal look is best.
A very important tip no matter what style you are going for always leave 5 to 8 inches or more, of wall space around you gallery wall.
If you do your art too high or too low or too close to the edges it just won't look balanced.
Here is an example of a perfectly balanced gallery wall. everything is cohesive even though all the frames and art are abit different.
the gallery wall is a perfect scale next to the wall leaving enough space around the permiteror of the wall.
The largest frame is in the middle making it the perfect focal point.
See how the two larger art pieces are on opistie sides with the medium sizes and smallest size mirror each other. This is a very clean formal look but the prints add some playfulness to the wall.
This is a perfectly balances gallery wall.
Here is an example of what not to do. First there is not enough wall space around the perimeter of the gallery wall and the scale of the frames to the size of the wall is wrong.
Although the colour palette is concessive and blends nicely there are to many small frames and no focal point. You need one larger print to draw the eye in and then you need to have frames that very in size, not a bunch of similar sizes.
This makes this wall look chaotic and sorry, a little messy.
I would have placed the largest print off centre in the middle of the wall not at the top and work my way out using less smaller frames and leaving at least 8 inches around the perimeter of the wall, maybe even more because this is a large wall.
Tip if you start with the latest fame first and work your way out its a lot easier to create a organic look with out it looking messy.
A helpful tip map out your gallery wall using paper and painter tape.
If you are a bit nervous and want to get your gallery right take a few extra minutes and map it out on you wall.
It makes it easier for you to visualize what it will look like on the wall and much easier to move around.
I'd say place it on the wall to get a feel for it, take a coffee break and then come back and see how it feels with fresh eyes. This is 100 percent fool proof because its give you a visual before for you commit.
Okay so I think I have given you all the basics and tips to help you make you gallery wall at home. so lets run through how I did my gallery wall.
firstly, I knew I was going for a modern vintage look and I knew I wanted my gallery wall to look more organic.
I gather art, and frames modern and vintage and gather way more than I needed so I had options.
I knew my wall space wasn't to big so I decided my largest art piece would be 11x14 and im in a basement so the ceiling are only 8ft so I thought that was best as my largest print. but I new I wanted to have 2 to 4 11x14 art so my gallery wall didn't have to many smaller art pieces and it look to cludder.
I went with, brown, gold, black as my frame colours with greens browns neutrals and warm tones for my art.
Frame sizes 11x14, 8x10, 10x10, 5x7 and 6x6 and I change up shapes oval, arched square, and rectangluar.
Helpful tip take the glass out of your frames it makes your print look more like authentic painted art. Plus I actually love how it photographs for social media you don't get the glare from the glass and I love the matte look in person as well the colours just pop.

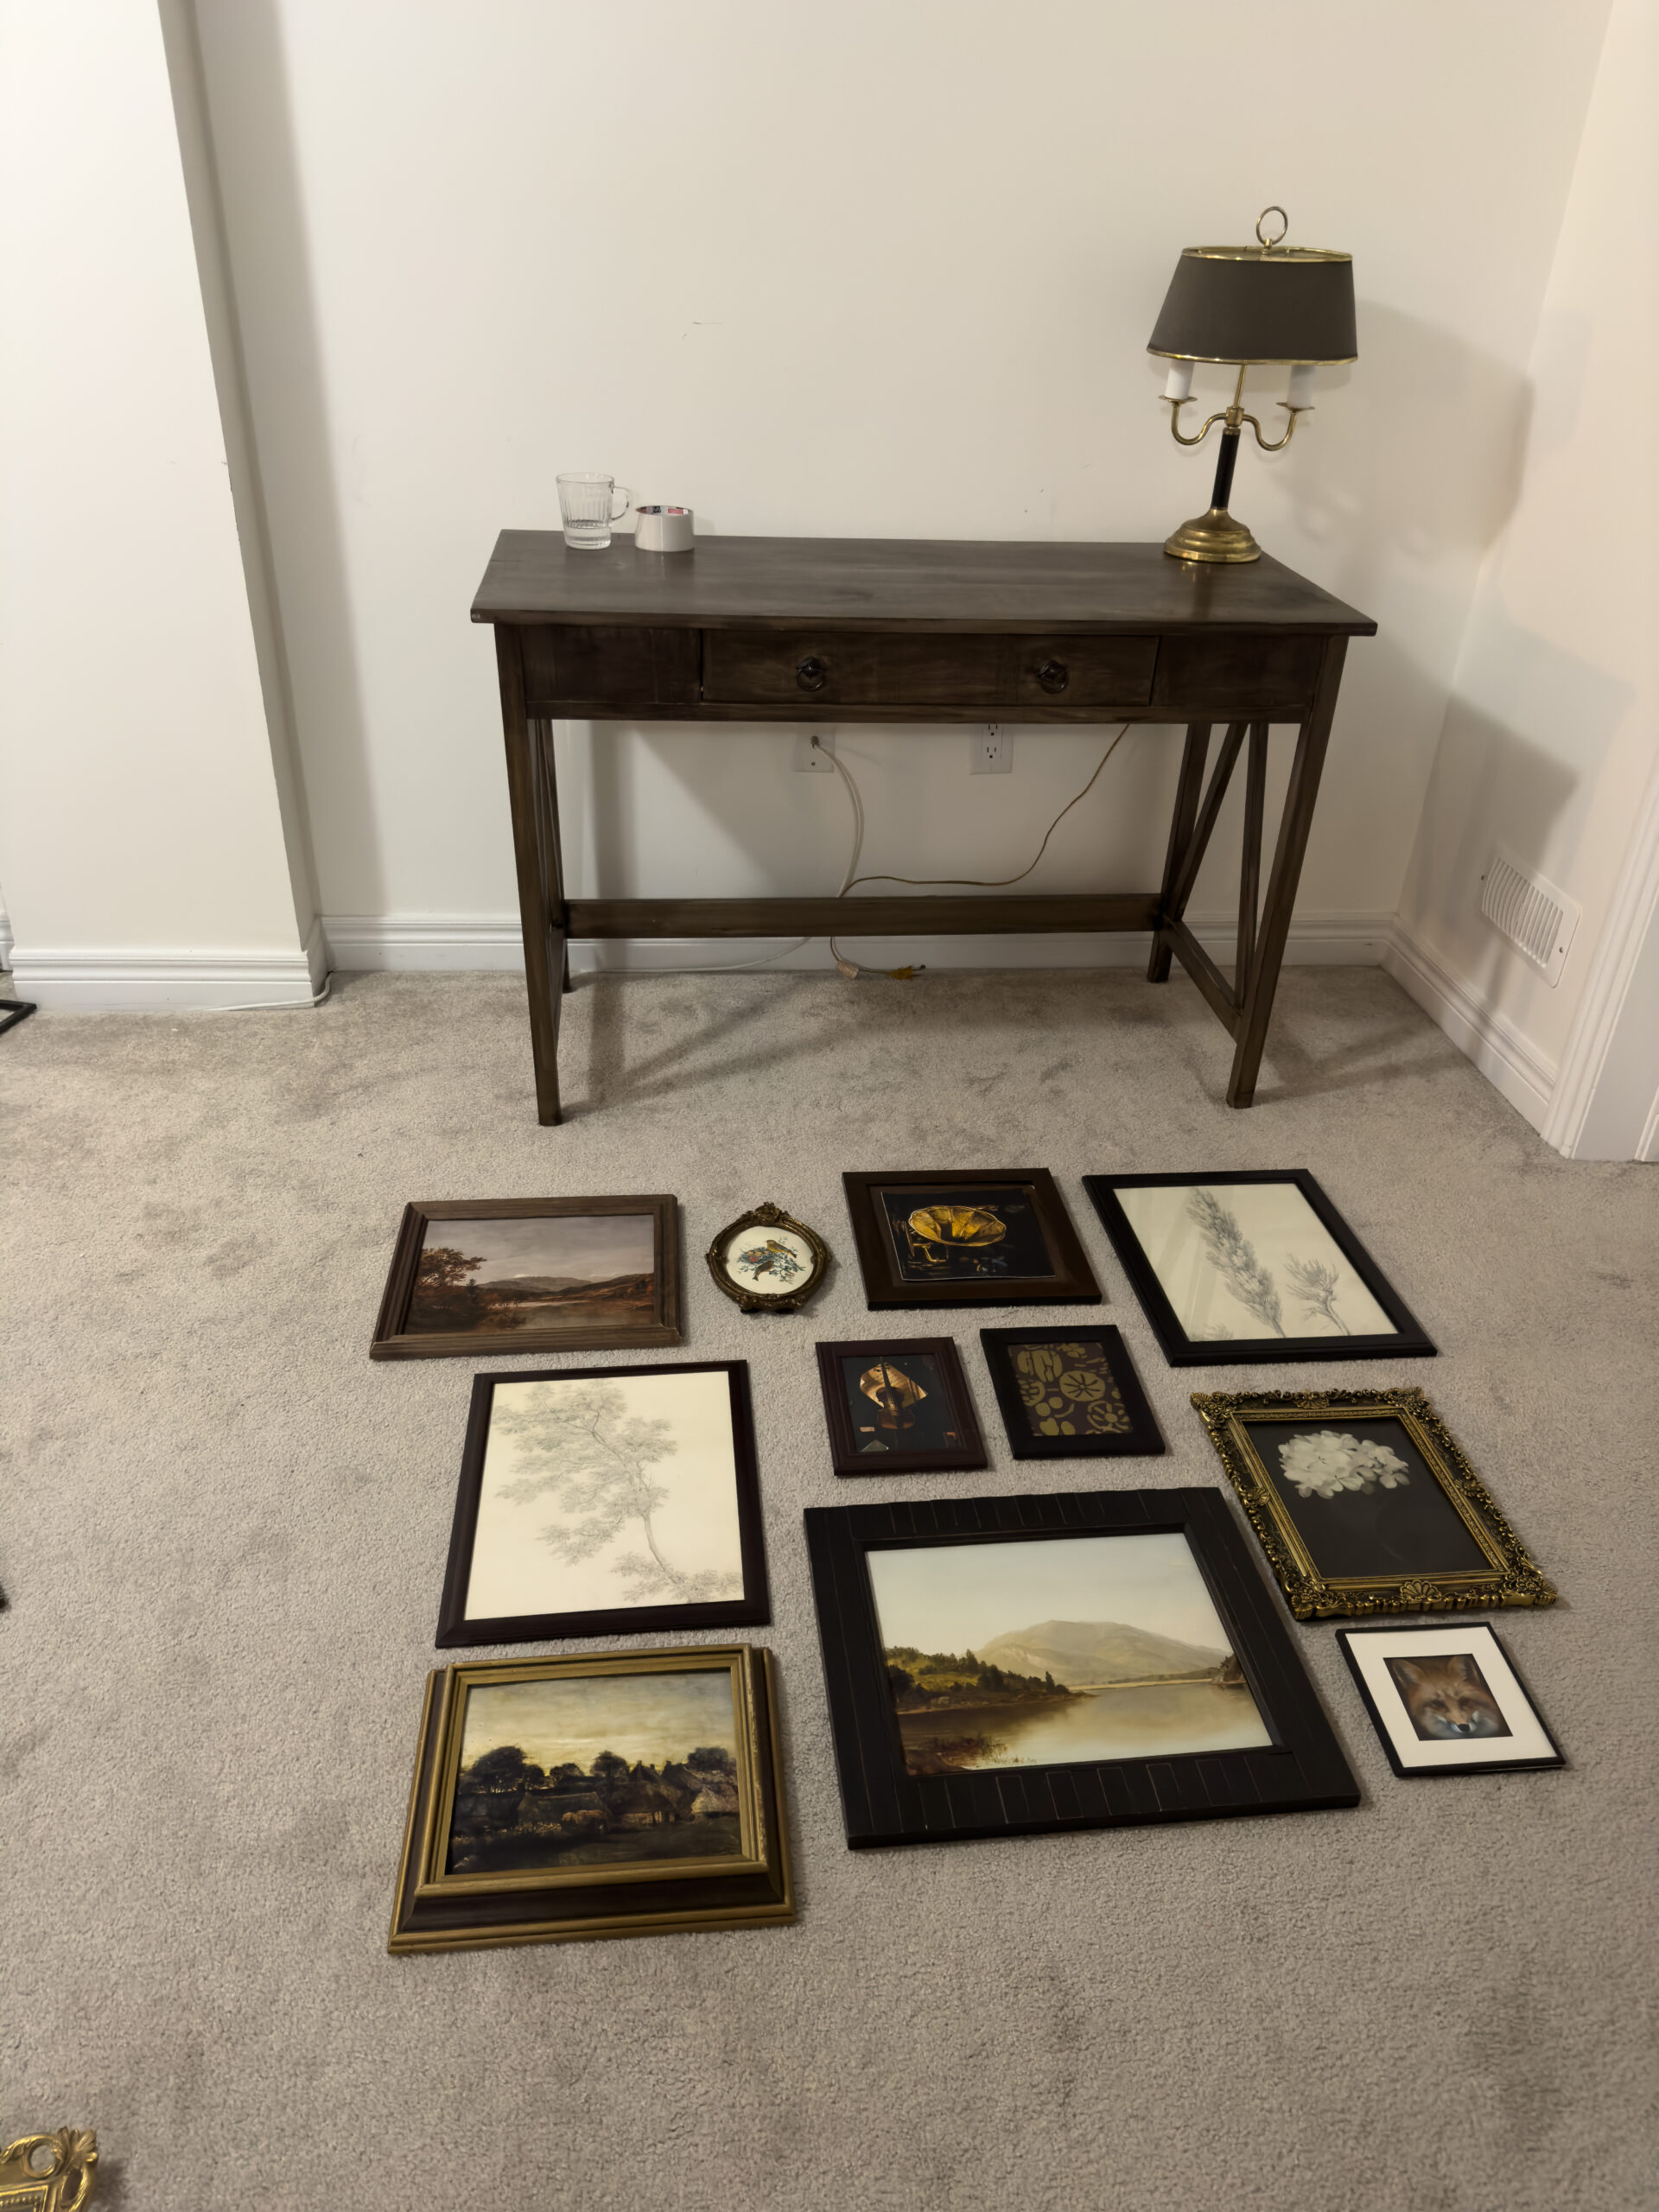
In the pictures below you can see how I first mapped out an idea of what I wanted on the wall on my floor.
I put the lamp on the desk because I wanted to make sure It didn't cover any of the art.
In the second picture started with my 11x14 framed art (looks small in the photo) I placed in the centre of the wall and I placed it a little higher because I planned to put books on the desk.
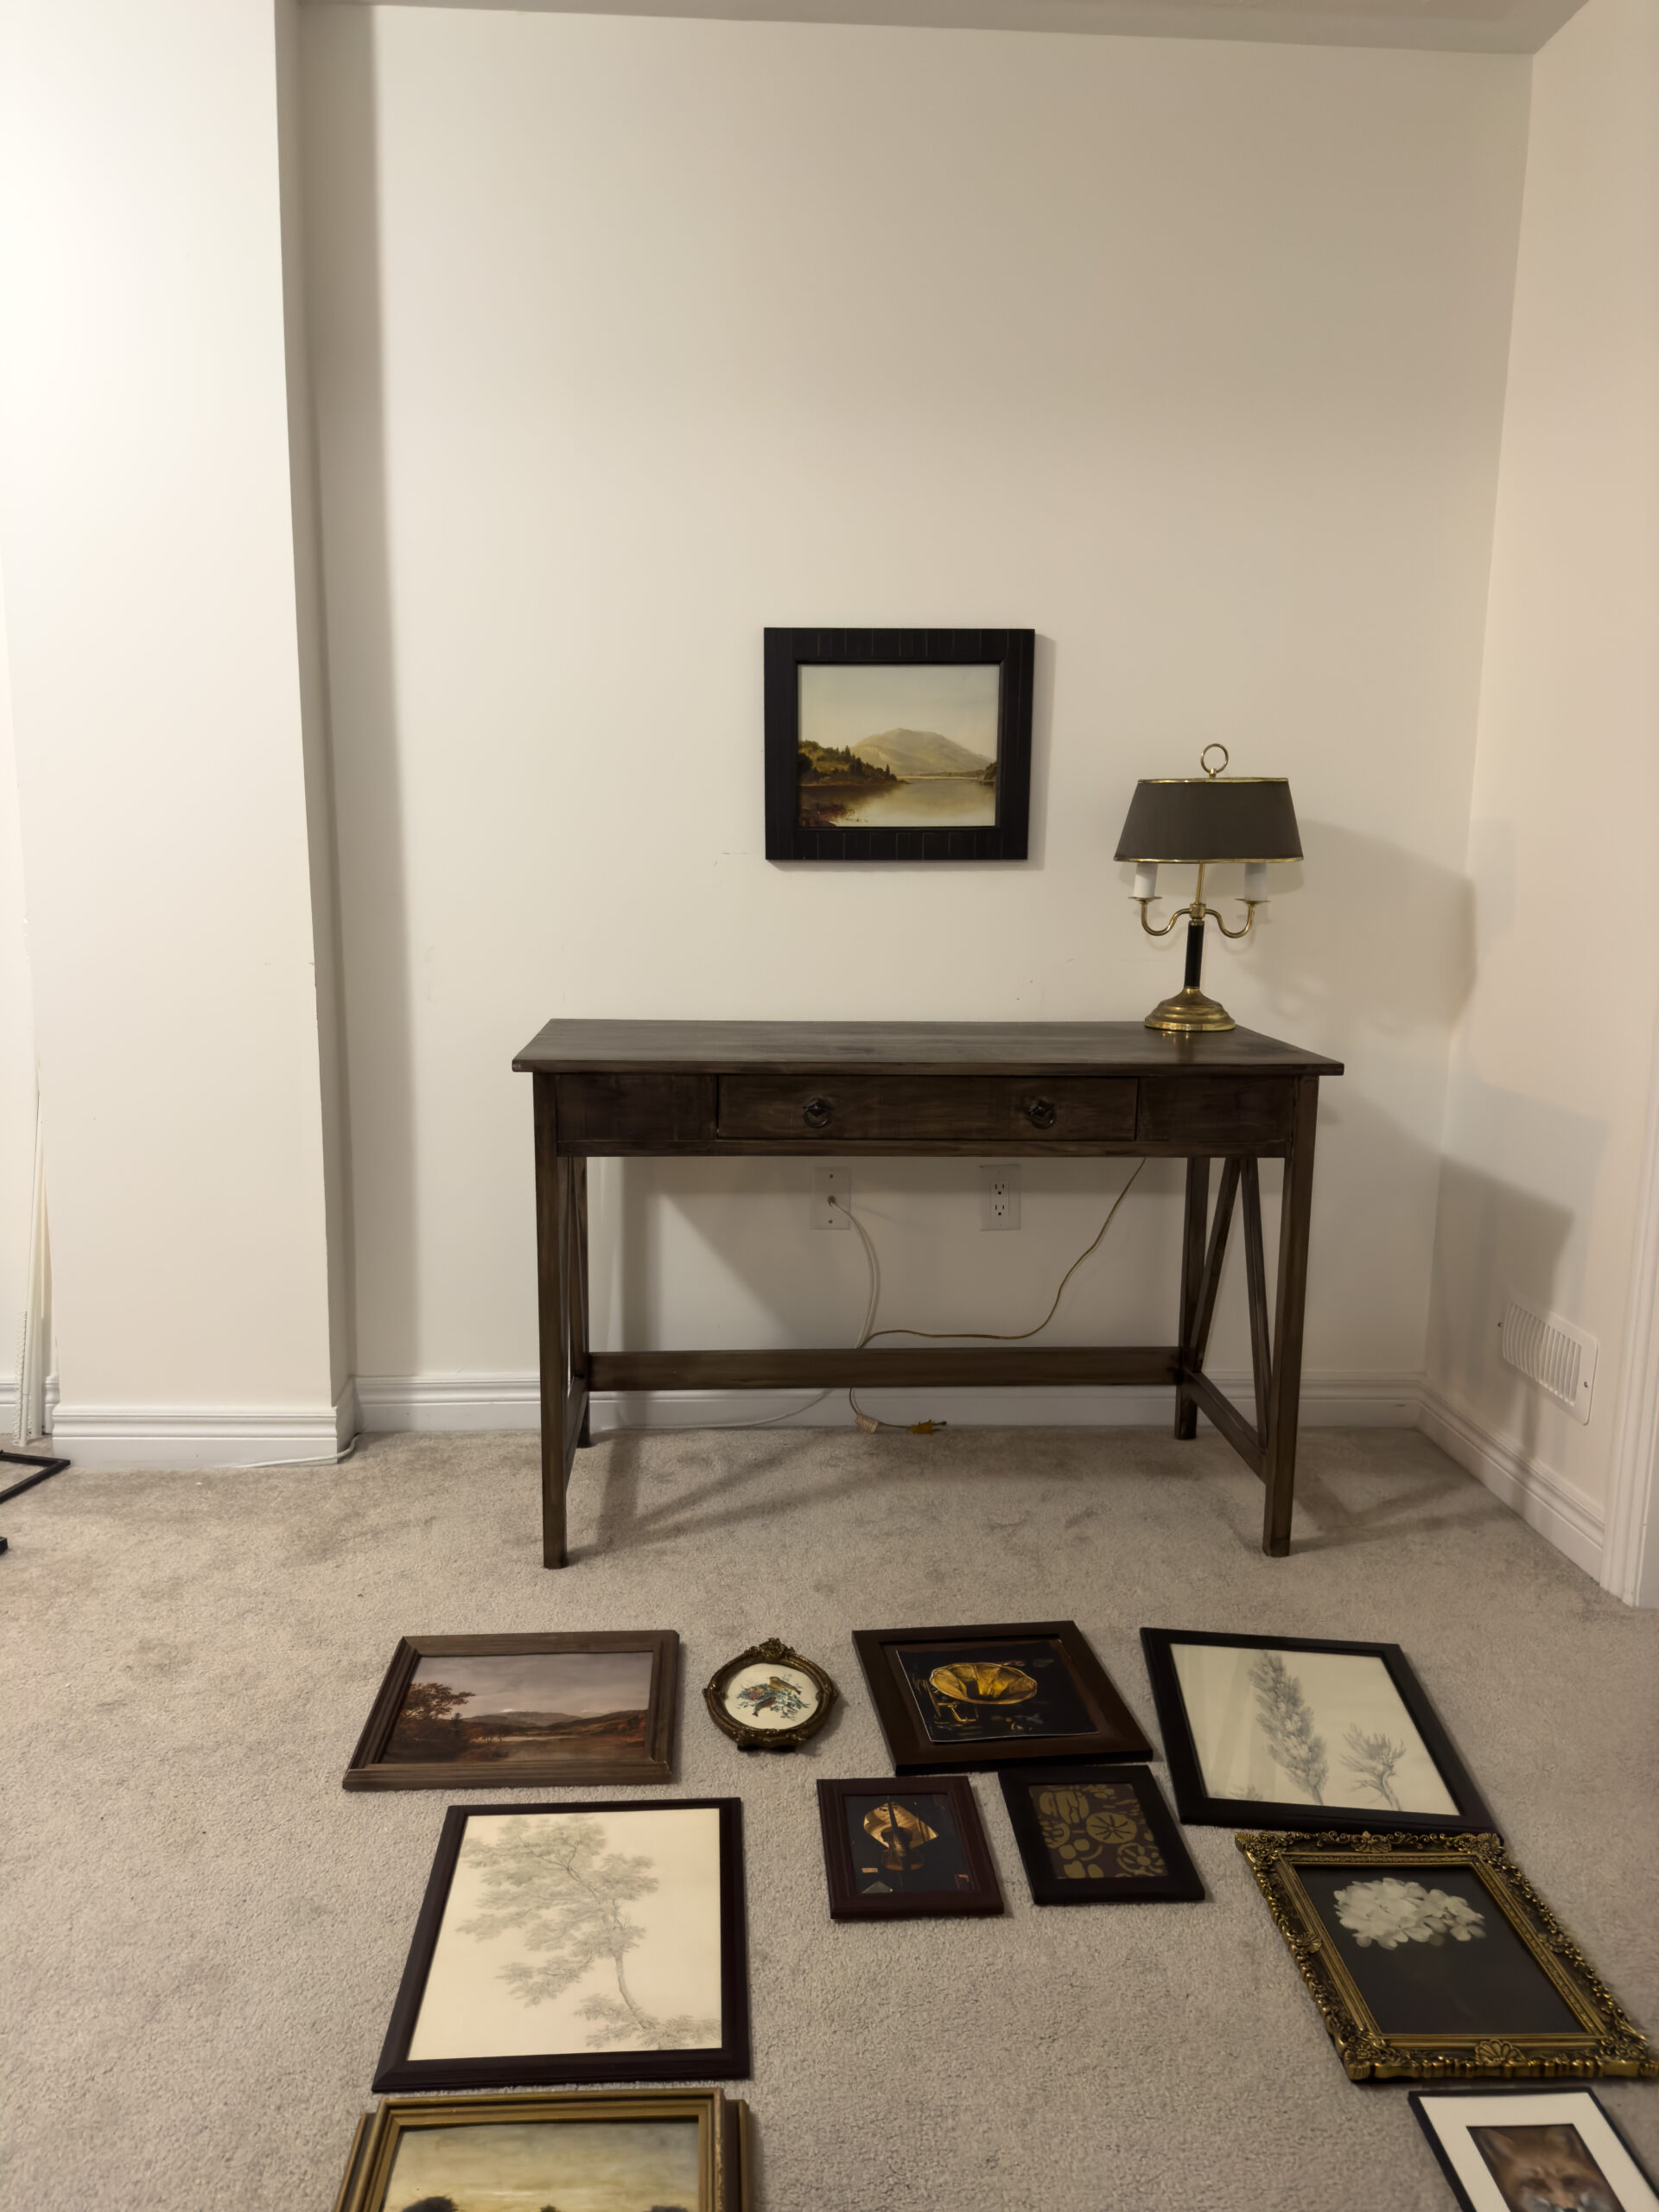
When placing the art on the wall I just kinda did what felt right. I used command strips so I could move things around if needed.
when you're doing something more organic, I think its best to place on wall step back and see how it looks. I did this with each piece of art and really helps you get a feel of what you the wall will look like.
Best part about command strips makes it easy to move things around if you aren't loving the direction your gallery wall is going in.
Here is my completed wall I left about 12inches to the ceiling and 8 inches on the left hand side of the wall.
I did decide to carry my gallery wall over to the right side wall and im so glad I did it just finished it off so nicely.
Something to know, this took me about 3 hours 2 cups of coffee and about 50 command strips lol I did do this by myself so having someone to help will make it go a lot faster.
Tip even though you are doing a eclectic organic layout to your gallery wall still make sure you use a level. its okay to have things unevenly space out but you still want everything to be straight
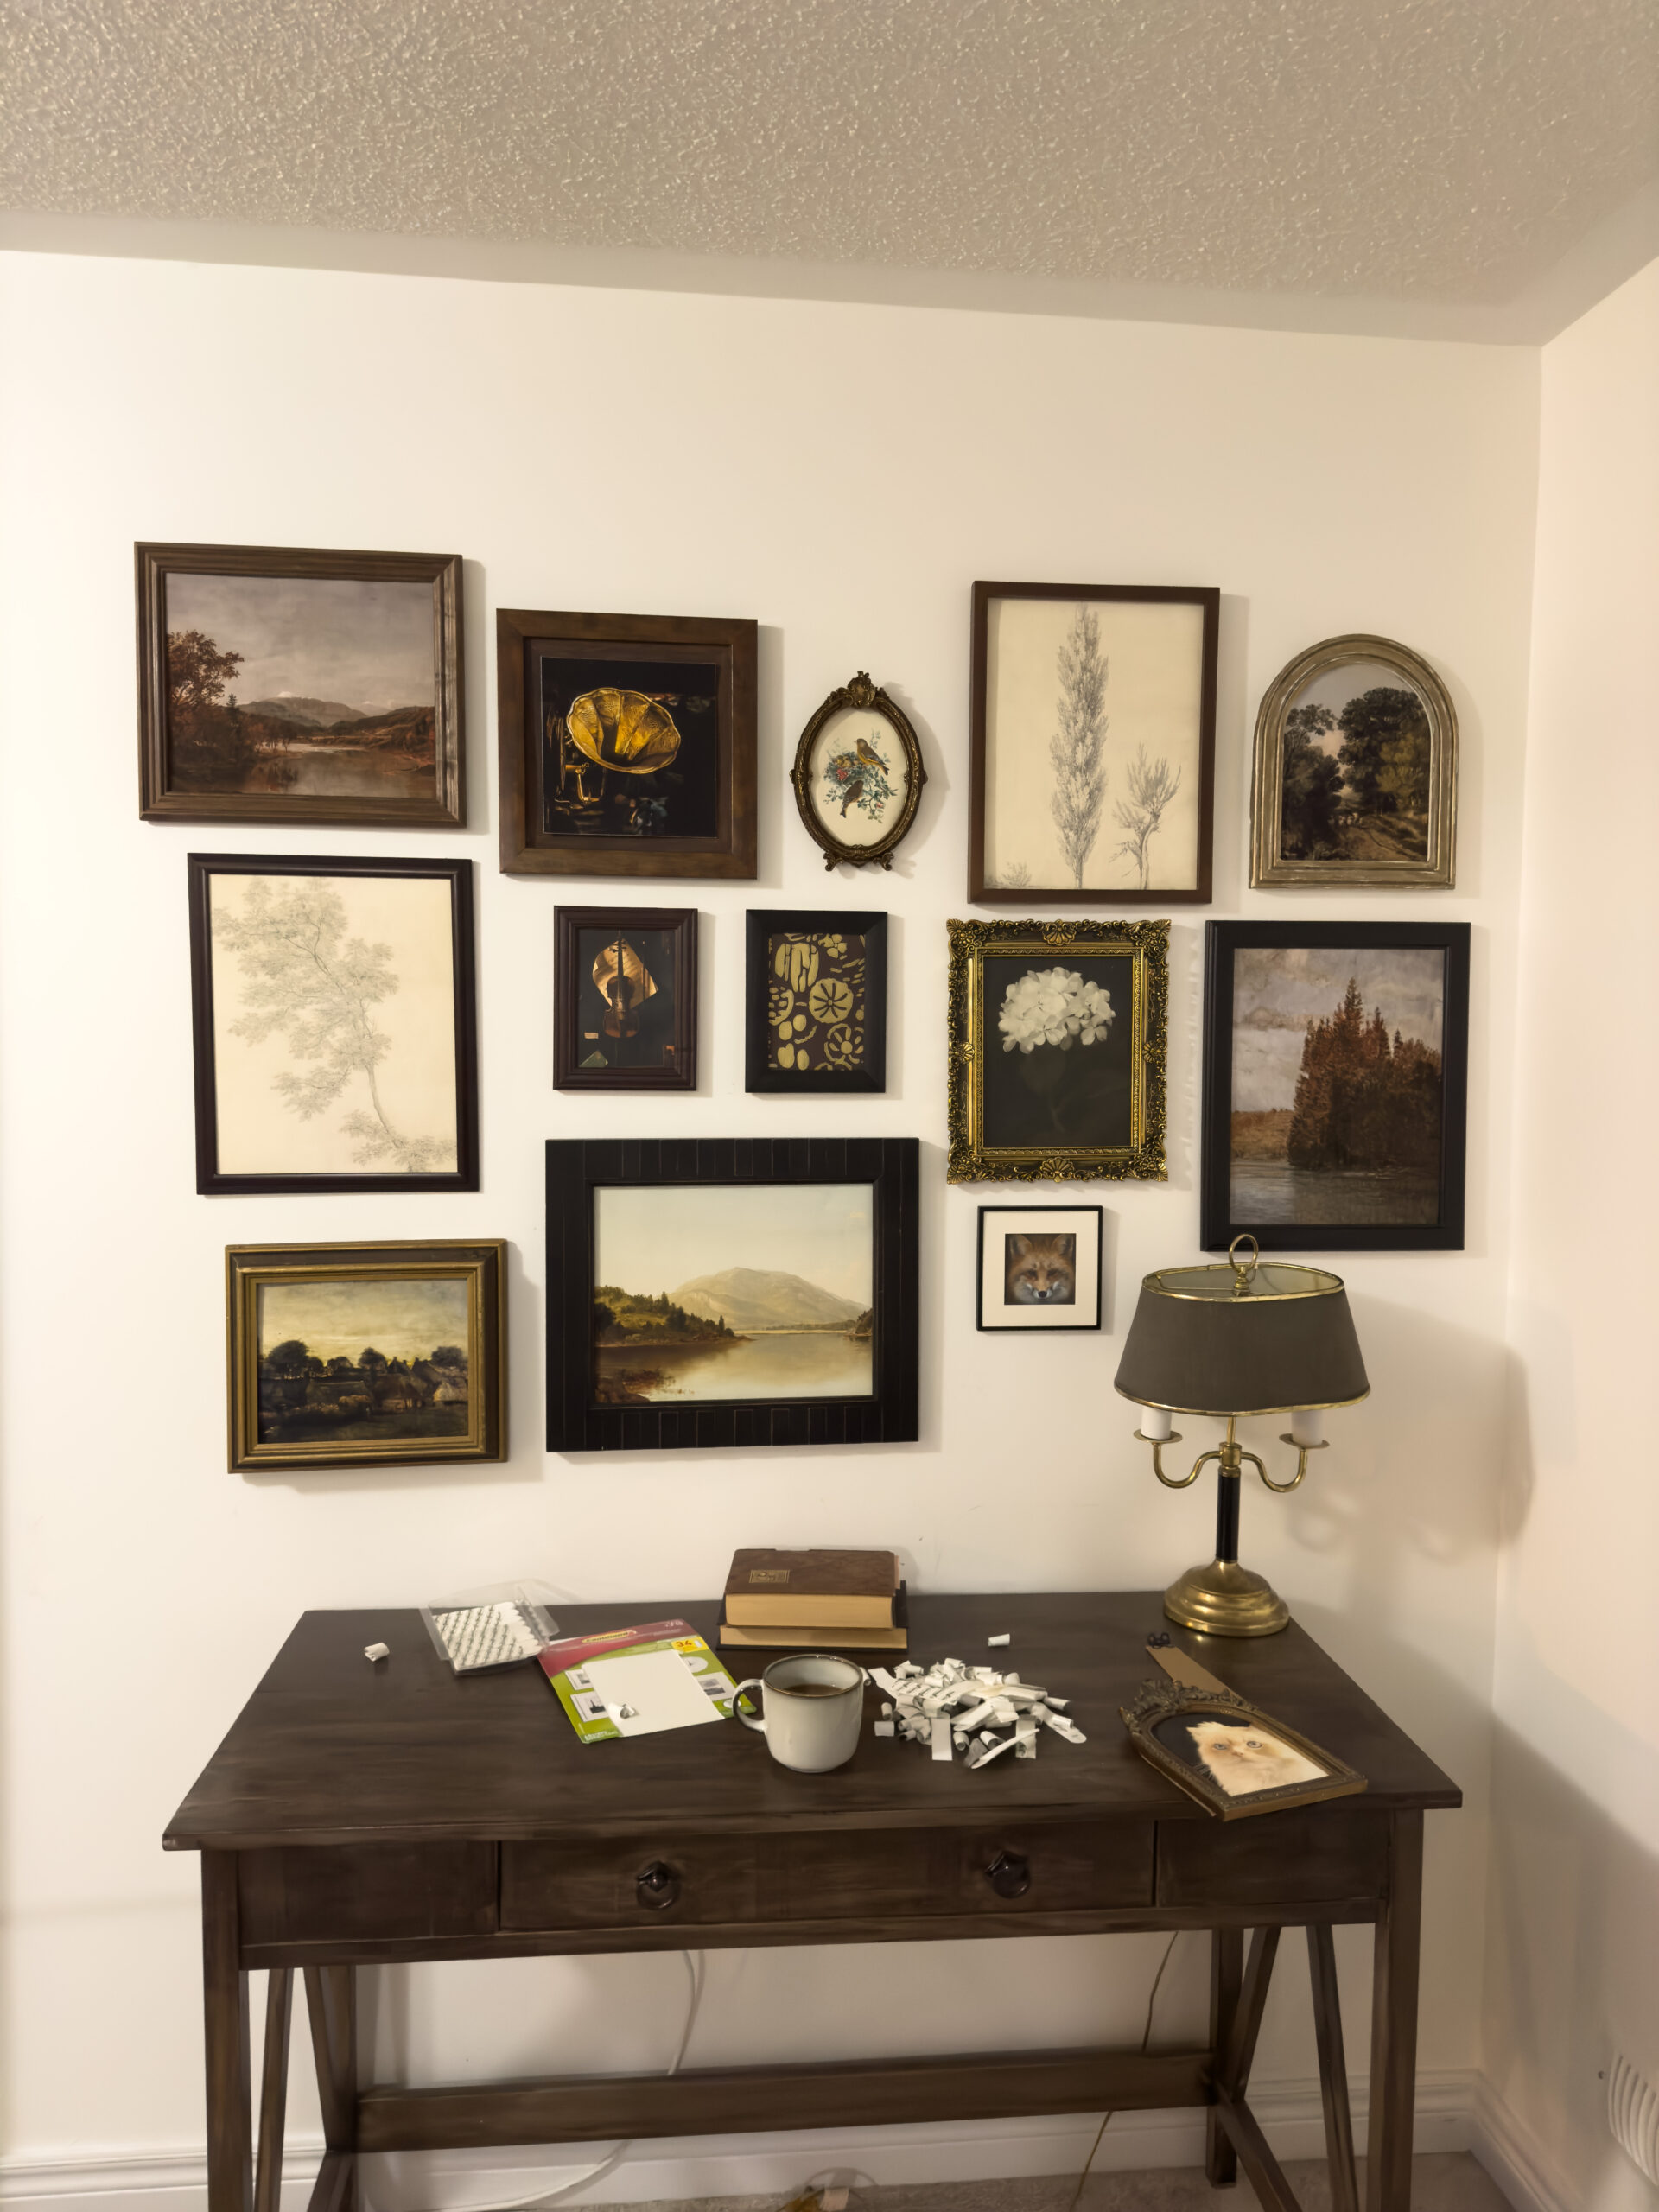
as you can see in the picture above I did move around some of my frames and I did add a few more pieces. I left it for a few hours then came back and decided to add some more.
This is why I love just placing the frames on the wall in an informal way it makes it fun to play around with it.
I really ended up loving how it turned out.
Now time to style! with this new hipstoric design style I really wanted to add some more vintage items and I wanted to make this office space feel relaxed and lived in. Also wanted it to look different I wanted to add something to this office space that we don't typically see all the time.
I added books to the desk but I also put them on the floor, I foul and old vintage stool for $6 at the shift store and placed my amazon record player on top and I love how cool this looks. plus you don't see this often in an office.
I love how mixing old and new makes a space feel, to me it feels relaxing and inviting.
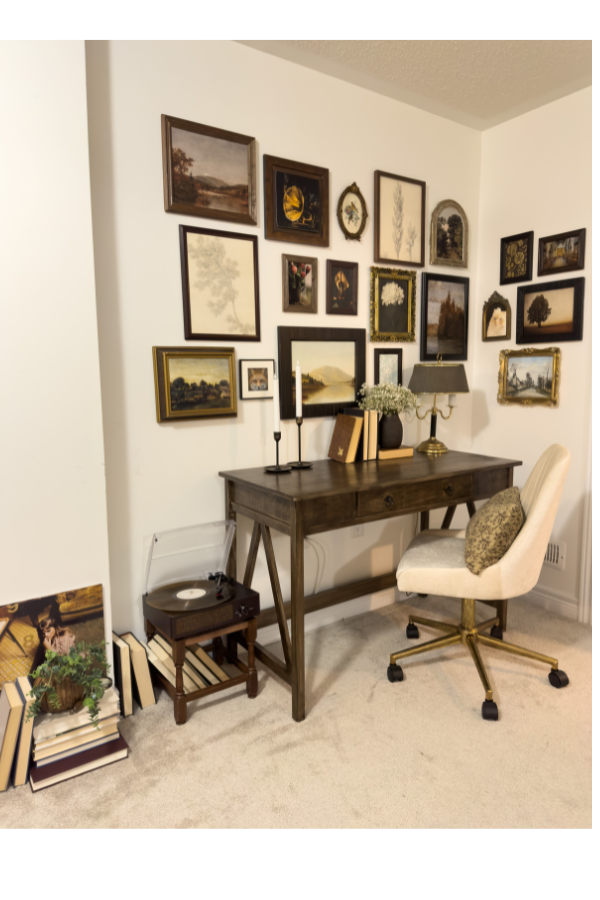
Here is the finished look after styling! my modern/vintage gallery wall and hipstoric office space dreams have become a reality. I do plan on added a renter friendly wall scone to the left part of the wall it does feel bare.
For the shopping links and inspiration ideas along with the moodboard for this space check out my last post shop my hipstoric home office
Thanks for reading along and my hope is that you feel more confident to tackle a gallery at home.


0 comments